

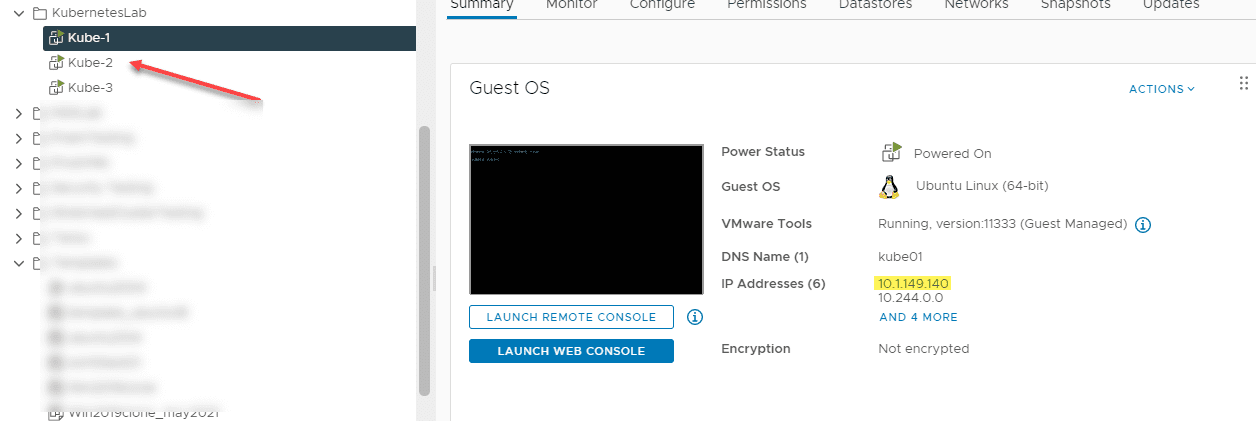
Have you wanted to get a Kubernetes Home lab setup to start learning Kubernetes? It can be an intimidating subject if you simply start Googling around and looking at various Kubernetes documentation. However, once you put together the actual steps required to put together a Kubernetes home lab setup using the kubeadm utility, it really isn’t that many steps. There is some prep work that you need to do beforehand however. In this lab setup, I am using VMware vSphere as the backend hypervisor to run the three virtual machines I am using as the Kubernetes nodes used as the master and worker nodes for the environment. Let’s take a look at this Kubernetes home lab setup step-by-step and see how it is put together.
VMware vSphere with Tanzu or not?
You may ask, why is this not using vSphere with Tanzu? The vSphere with Tanzu solution is an amazing solution, and I have Tanzu running in nested lab environments. This Kubernetes home lab though I wanted to be comprised of a more basic and vanilla setup to help learn the inner-workings of setting up Kubernetes. I highly recommend learning both configurations. VMware is the easy-button for multi-cloud environments. However, it is great to also learn a more vanilla implementation of Kubernetes as well.
Leverage group snapshots for learning
One of the things I like to do when I am learning something new is leverage snapshots. Have you had a moment where you had things setup perfectly and then run a command that trashes everything? Snapshots are ideal for learning something new. At each stage, when you have the environment working, take a snapshot.
For these types of situations, I like to leverage the “bulk snapshot” or mass snapshot if you like. Targeting a folder, you can create the same snapshot for all the VMs there. This works out great to keep the state of your lab in lock step. For my three Kubernetes VMs, I used the following:
Creating:
get-vm -location "KubernetesLab" | new-snapshot -Memory -quiesce -name "Before creating Kubernetes cluster - 6.17.2021"


Rolling back:
get-vm -location "KubernetesLab" | set-vm -snapshot "Before creating Kubernetes cluster - 6.17.2021" -confirm:$false
Kubernetes Home Lab Setup Step-by-Step
In this Kubernetes home lab setup, I will be using the following:
- VMware vSphere 7.0 Update 2a – backing hypervisor
- 3 Ubuntu 20.04 virtual machines – provisioned from template
- See how to build an Ubuntu Packer template here
- Kubeadm to initialize and provision the Kubernetes cluster
- Flannel as the container network interface
- Installing the Kubernetes Dashboard
Let’s look at the following steps to provision the Kubernetes home lab setup:
- Install DockerIO and change Docker to Systemd
- Install Kubeadm
- Initialize the Kubernetes cluster
- Export admin config
- Provision the network overlay
- Join worker nodes
- Install the Kubernetes Dashboard
1. Install Docker Container Runtime
You need to install a container runtime into each of your Kubernetes nodes for running Pods. Docker is the most popular option, so that is what I have installed in each of my Ubuntu 20.04 virtual machines. To install Docker in Ubuntu, use the following command:
sudo apt install docker.ioYou will want to change Docker daemon to use systemd for the
management of the container’s cgroups. To do this, after installing
Docker, run the following:
cat <<EOF | sudo tee /etc/docker/daemon.json
{
  "exec-opts": ["native.cgroupdriver=systemd"],
  "log-driver": "json-file",
  "log-opts": {
    "max-size": "100m"
  },
  "storage-driver": "overlay2"
}
EOF
Restart your Docker services
sudo systemctl enable docker
sudo systemctl daemon-reload
sudo systemctl restart docker
2. Install Kubeadm
Kubeadm is a tool that helps to install and configure a Kubernetes cluster in a much easier way than performing all steps manually. It helps to bootstrap a Kubernetes cluster with the necessary minimum configuration needed to get the Kubernetes cluster up and running. To install kubeadm, perform the following in Ubuntu. This updates the package index and installs packages needed to use Kubernetes apt repo, downloads the Google Cloud public signing key, adds the Kubernetes apt repo, and installs kubelet, kubeadm, and kubectl.
apt update && apt upgrade -y
sudo apt-get install -y apt-transport-https ca-certificates curl

sudo curl -fsSLo /usr/share/keyrings/kubernetes-archive-keyring.gpg
https://packages.cloud.google.com/apt/doc/apt-key.gpg

echo "deb [signed-by=/usr/share/keyrings/kubernetes-archive-keyring.gpg] https://apt.kubernetes.io/ kubernetes-xenial main" | sudo tee /etc/apt/sources.list.d/kubernetes.list

sudo apt-get update
sudo apt-get install -y kubelet kubeadm kubectl
sudo apt-mark hold kubelet kubeadm kubectl
3. Initialize the Kubernetes Cluster
After installing kubeadm, we can use it to initialize the Kubernetes cluster. To do that, use the following command:
kubeadm init --pod-network-cidr=<your pods CIDR>
Example:  kubeadm init --pod-network-cidr=10.244.0.0/16
Export your admin.conf if you are logged in as root this way:
export KUBECONFIG=/etc/kubernetes/admin.conf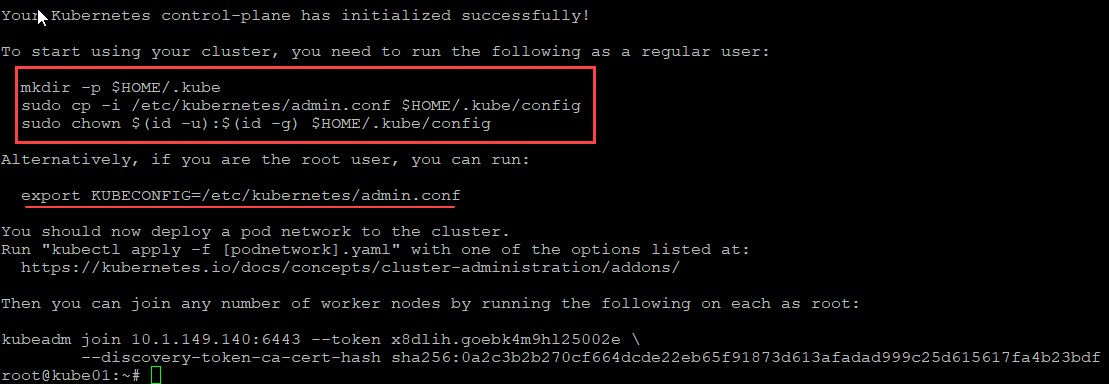
There are many networking solutions available for Kubernetes. You can find the full list and links here: Cluster Networking | Kubernetes. The next step is to provision the network overlay. I am using the Flannel network. To use it, run the following:
kubectl apply -f https://raw.githubusercontent.com/coreos/flannel/master/Documentation/kube-flannel.yml
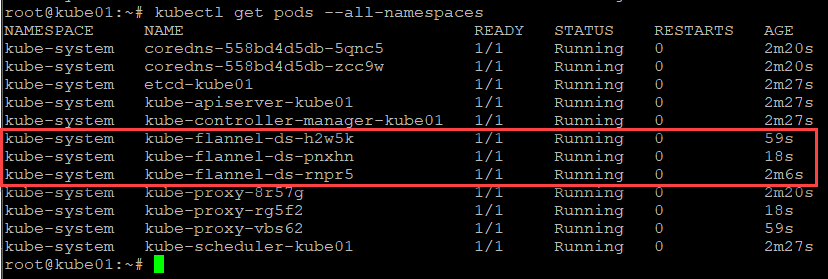
After joining the workers, as you can see below, you will see Flannel pods for your workers running.
4. Join Worker Nodes
To join Kubernetes worker nodes to the Kubernetes cluster, simply run the command that is displayed after you initialize the Kubernetes cluster with kubeadm. It will look something like this:
kubeadm join 10.1.149.140:6443 --token yx8nnx.sf7ep8657f3j5j6r \
        --discovery-token-ca-cert-hash sha256:8185d65970297cce220dc35f549d6343ad12a385f2b71b925bf21dae24916921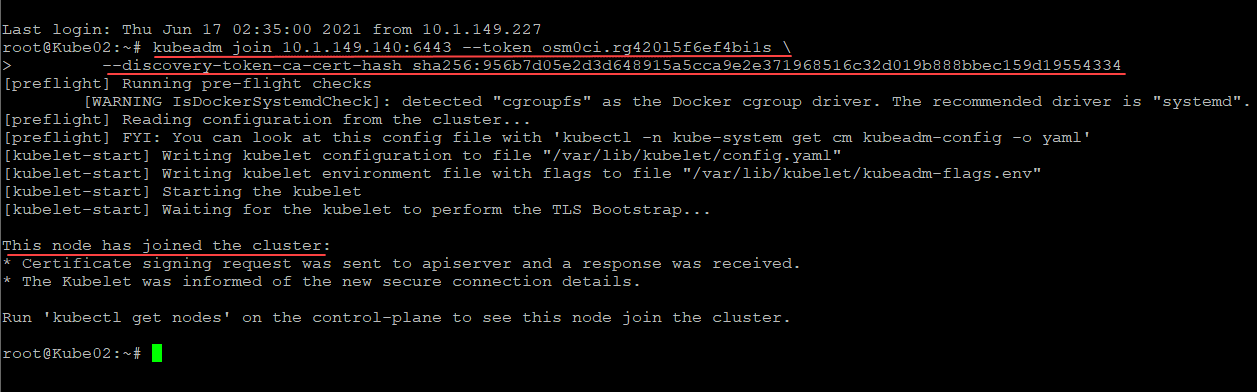

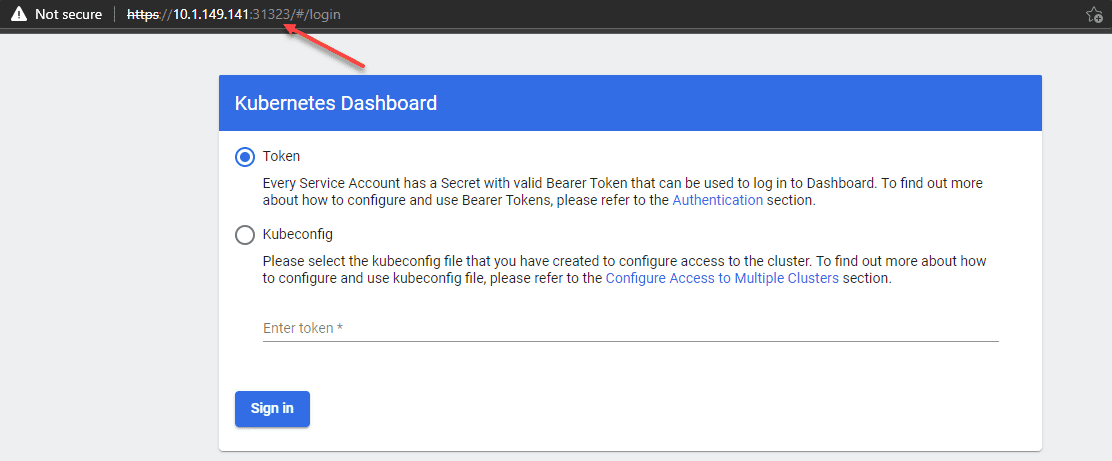
5. Install the Kubernetes Dashboard
You most likely will want to install the Kubernetes dashboard. To install the Kubernetes Dashboard, grab the latest YAML file from here: Web UI (Dashboard) | Kubernetes
The script will look like this:
kubectl apply -f https://raw.githubusercontent.com/kubernetes/dashboard/v2.2.0/aio/deploy/recommended.yaml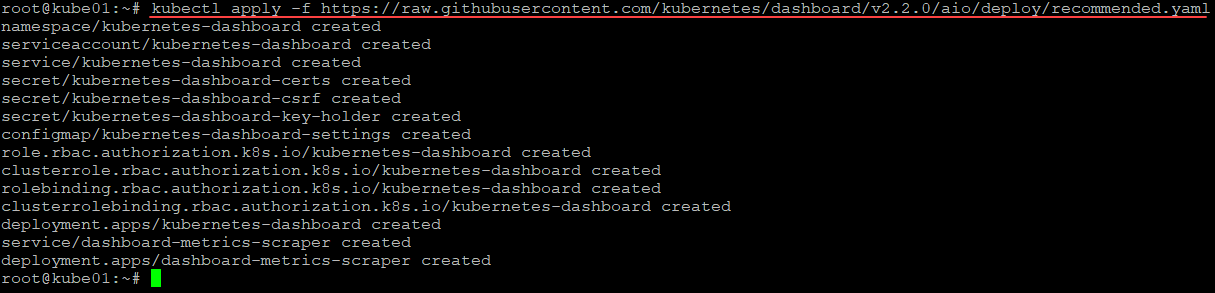
Setup Nodeport networking by editing the kubernetes-dashboard svc. To do that, run the command:
kubectl -n kubernetes-dashboard edit svc kubernetes-dashboardEdit the type to NodePort and add the nodePort section under ports. Choose an arbitrary port been 30000-32767.
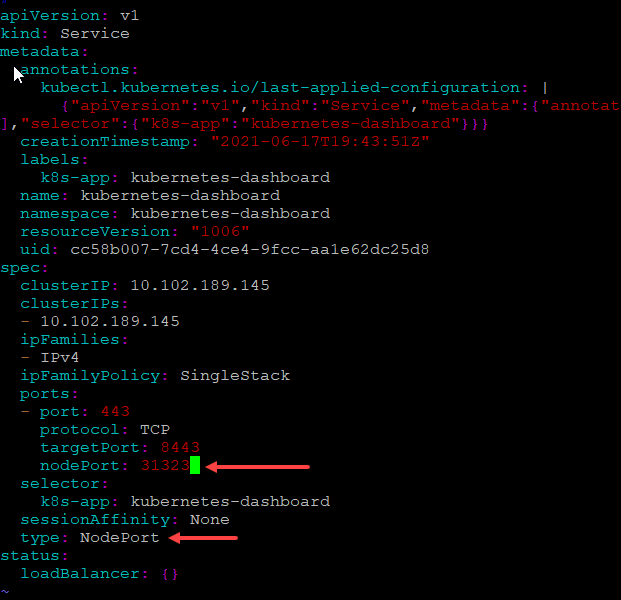
Verify the Kubernetes-dashboard service using:
kubectl -n kubernetes-dashboard get svc
Wrapping up
This post has walked through a basic quick configuration of getting a Kubernetes home lab setup step-by-step with a few commands to run. Keep in mind using this approach you need to have your own VMs that will serve as Kubernetes worker nodes as well as the control node or master. Look for additional Kubernetes home lab setup step-by-step guides as I will cover the Dashboard further, as well as bringing in additional workloads.


0 Comments