

One of the lab additions made in the past couple of weeks is a new Synology DS1621xs+ 6-bay NAS device. I have been wanting to add a NAS device for quite some time and decided to pull the trigger. The NAS for my home lab will be for general file storage, backups, and to augment my storage solutions available for my home lab services. This will fit nicely alongside the VMware vSAN datastore and additional local datastores I have configured in the lab environment. The process to configure an iSCSI LUN for consumption in your VMware vSphere environment is straightforward. Let’s look at iSCSI Synology VMware Configuration step-by-step.
Why an iSCSI datastore in the home lab?
As a quick overview of why I want/need an iSCSI datastore in the home lab, in addition to other storage technologies such as VMware vSphere and local datastores, it all comes down to options. Having the traditional iSCSI storage available to my vSphere hosts gives me additional options to move workloads around and even as a target possibly for VM replicas.
It will also provide a good backup storage technology in case I have an outage on my main vSAN cluster. Also, I have always liked SANs NASs and other storage technologies. So, it is great to have this to play with, in the home lab environment once again.
iSCSI Synology VMware Configuration step-by-step
The process for the iSCSI Synology VMware configuration involved the following:
- Configuring the network interface for the iSCSI LUN
- Creating the iSCSI LUN in the Synology SAN Manager
- Adding the Distributed Port Group and VLAN for my iSCSI network
- Adding the iSCSI VMkernel port and IP address in vSphere
- Add the iSCSI Software Adapter and connect the VMkernel port to the iSCSI LUN
- Add the new iSCSI vSphere datastore
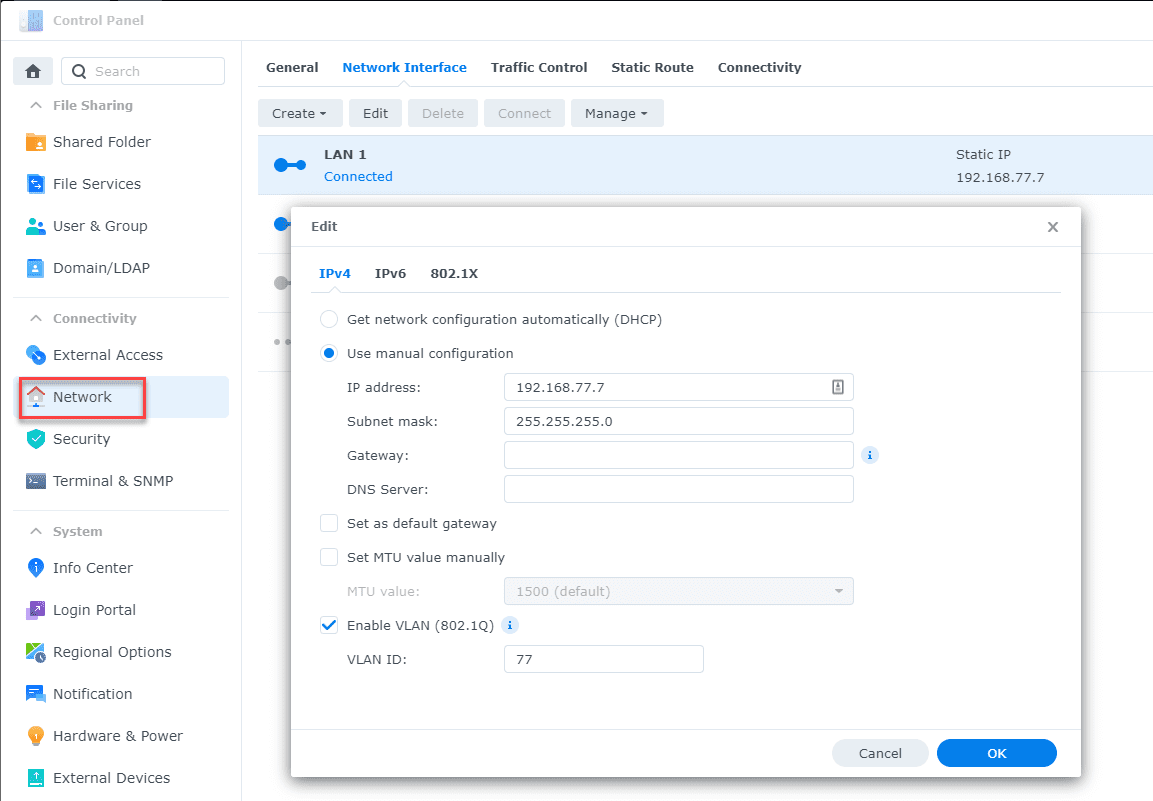
1. Configuring the network interface for the iSCSI LUN
On the Synology DS1621xs+ NAS, the 1st LAN port is the 10 gig connection. Below, I am configuring the network interface IP address and VLAN tag for the iSCSI network (tagged on my 10 gig switch).
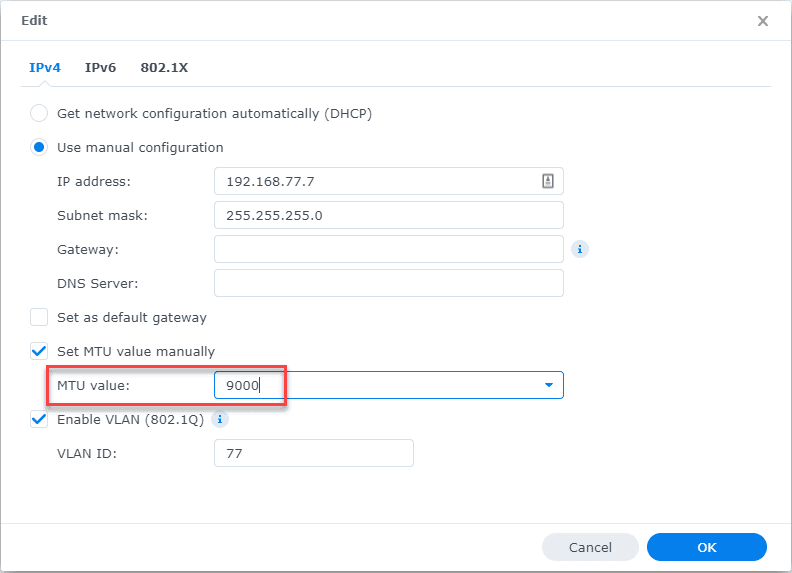
I didn’t capture this configuration in the above screenshot. However, below, I am setting the MTU value to 9000 for jumbo frames with iSCSI.
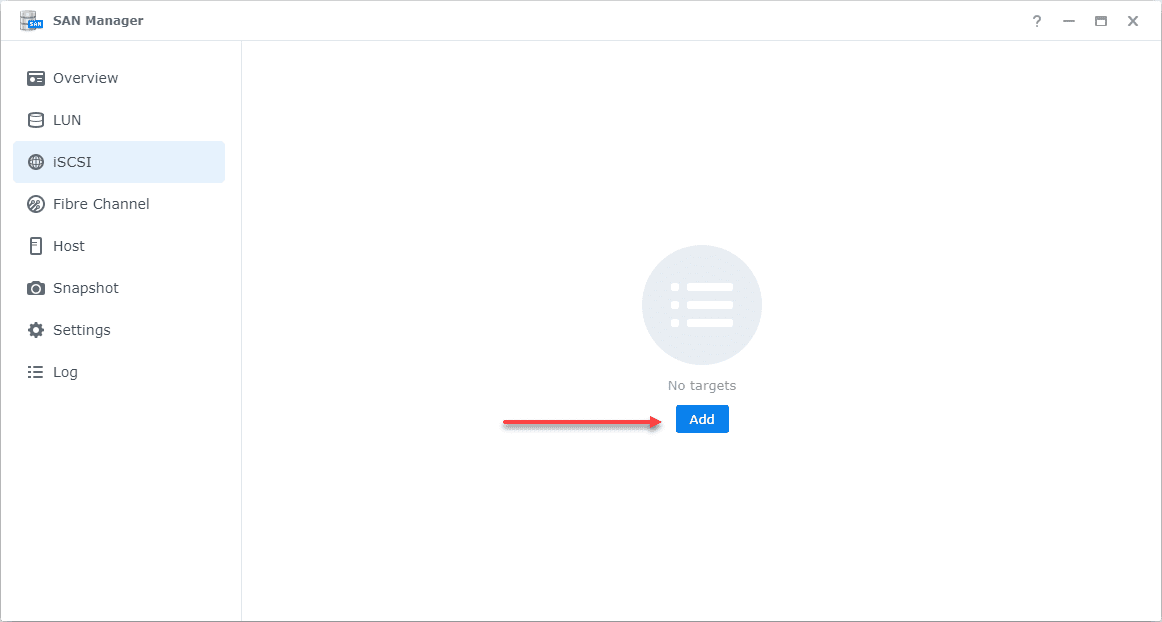
2. Creating the iSCSI LUN in the Synology SAN Manager
Launch the Synology SAN Manager and select iSCSI > Add.
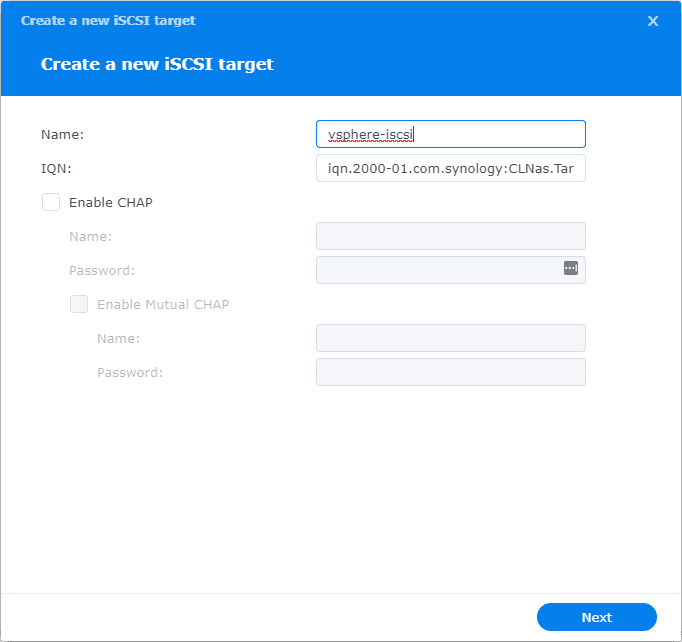
Name the iSCSI target and take note of the IQN address.
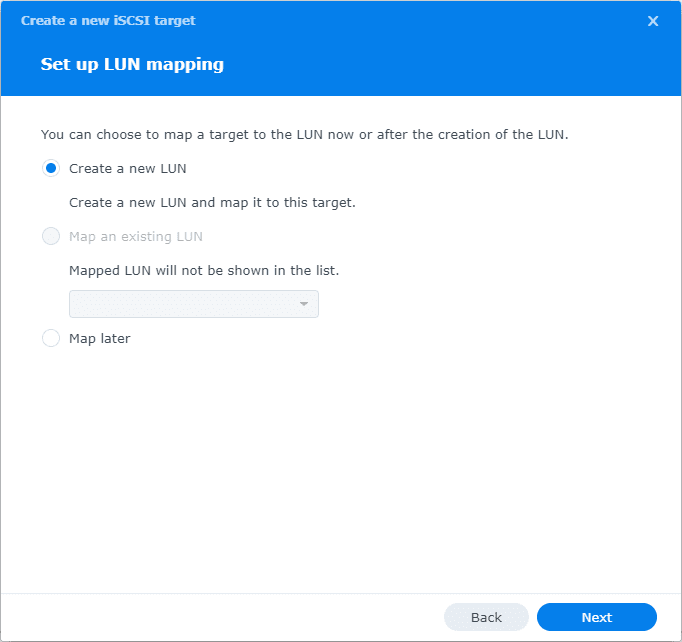
Next, we need to create a new LUN. Choose Create a new LUN.
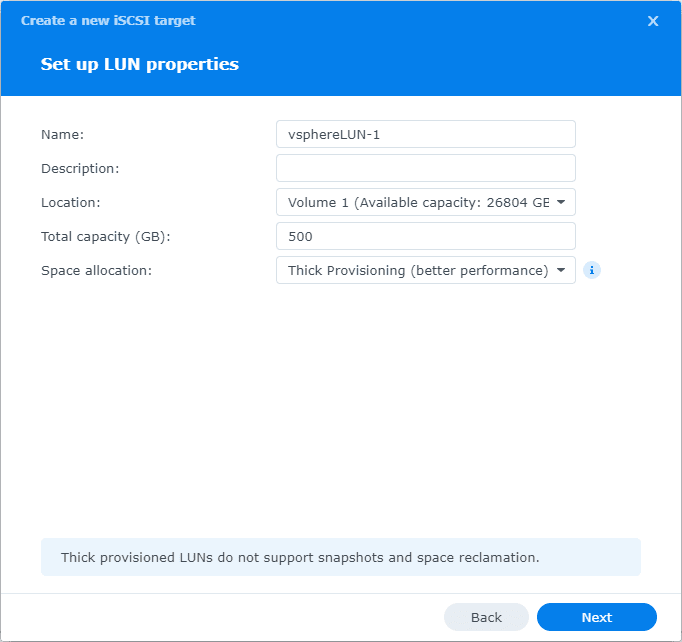
Configure a name for the LUN and choose the location and space allocation scheme.
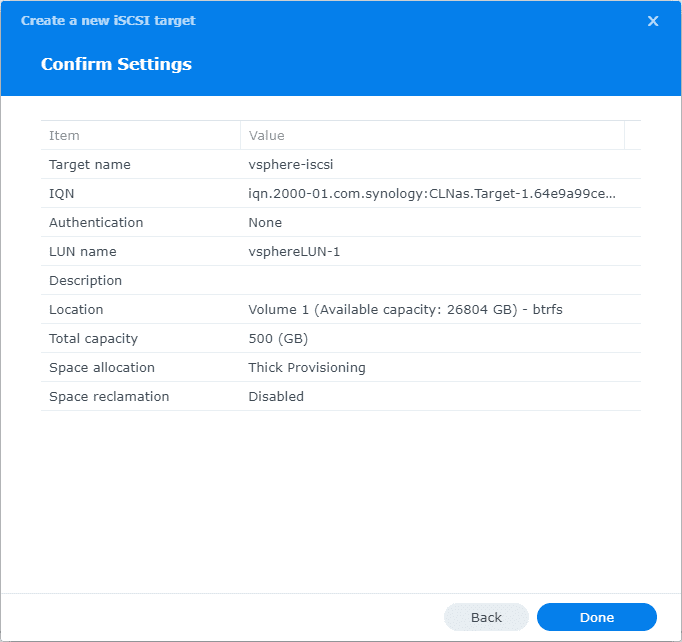
Confirm the settings by reviewing the configuration and click Done.
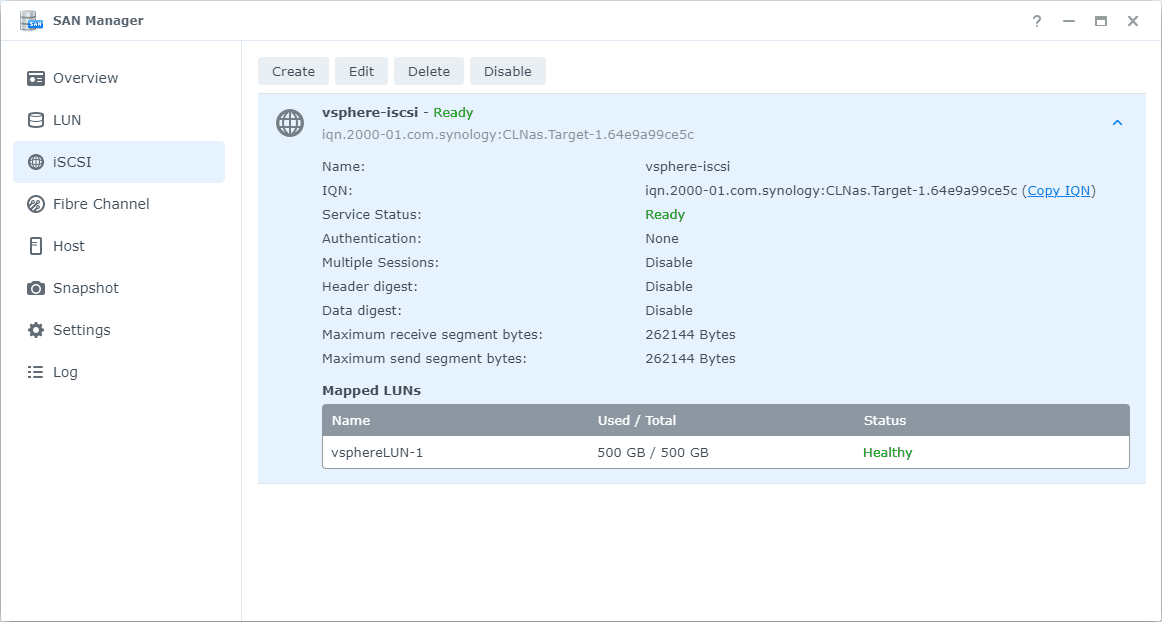
You should see the newly created LUN showing Ready.
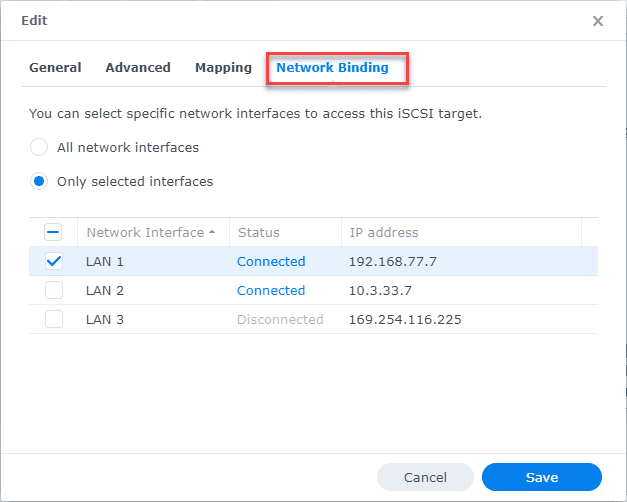
Next, click Edit on the LUN and under advanced settings, click the checkbox next to Allow multiple sessions from one or more iSCSI initiators. This allows you to have more than one ESXi host connected to the same LUN. VMFS is a cluster-aware file system so it is safe to do this with vSphere.

Under Network Binding, select the NIC you want to use for iSCSI. By default it presents the LUN to all network interfaces, which we don’t want for many reasons. Here, I am selecting my 10 gig connection.
3. Adding the Distributed Port Group and VLAN for my iSCSI network
In order to add a VMkernel port and IP address for iSCSI traffic, you need to add your port group or dedicated vSwitch to your ESXi hosts. I am using vSphere Distributed Switches in the home lab environment. So, below, I am adding a new DGP-iscsi port group and setting the Teaming and failover policy.
In order for vSphere to recognize this as a compliant iSCSI vSwitch port group, you need to ensure your binding is set to one connection per port group. For me I have (2) 10 gig connections backing the Distributed Switch. So, on this particular port group, I had to set the teaming and failover policy to one Active and one unused. To get the performance of both, you can add (2) new port groups with each one having the other 10 gig connection as Active.

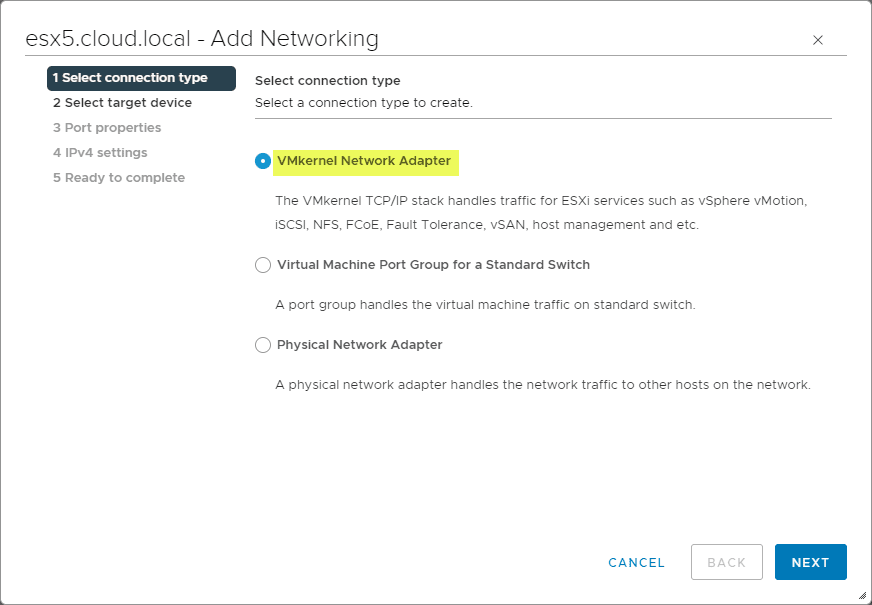
4. Adding the iSCSI VMkernel port and IP address in vSphere
Next, we need to add the iSCSI VMkernel port and IP address in vSphere. Let’s step through that process.
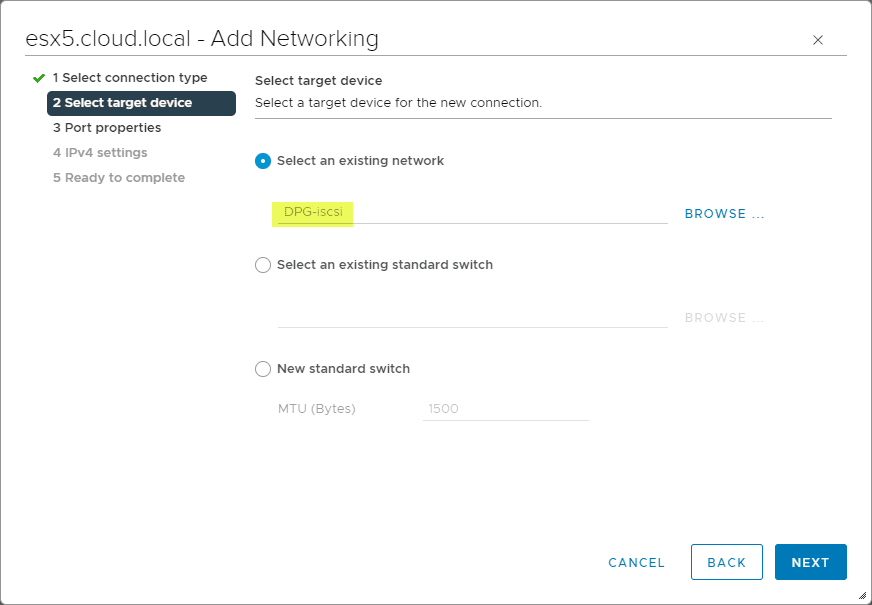
SElect the existing network you have previously configured for iSCSI.
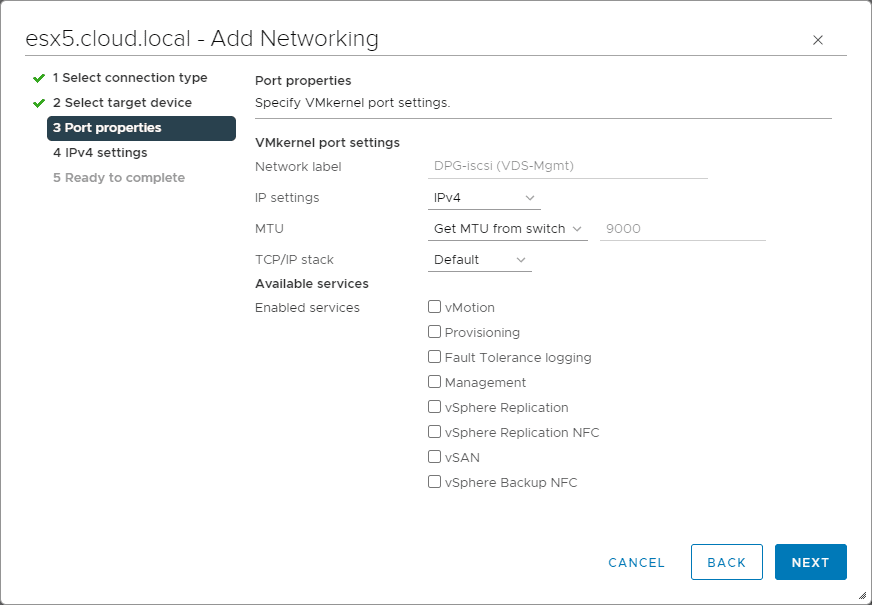
For iSCSI, you don’t select any services. Leave this screen as is and click Next.
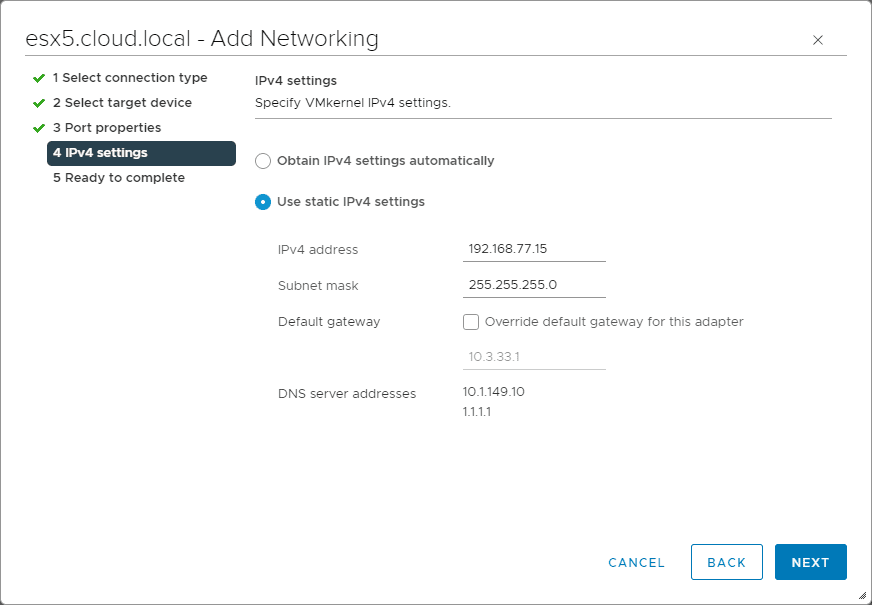
Configure the IP address information for iSCSI connectivity.
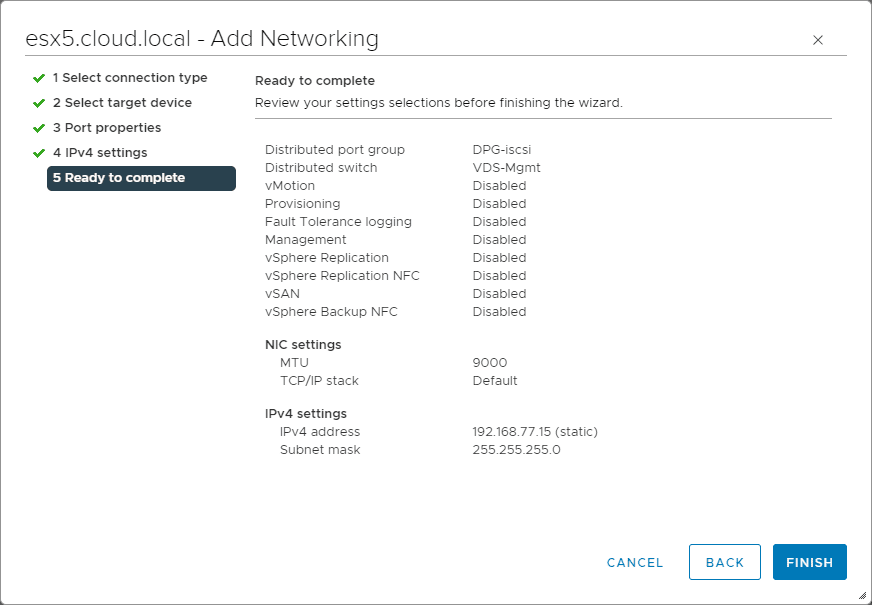
Review the configuration and click Finish.
5. Add the iSCSI Software Adapter and connect the VMkernel port to the iSCSI LUN
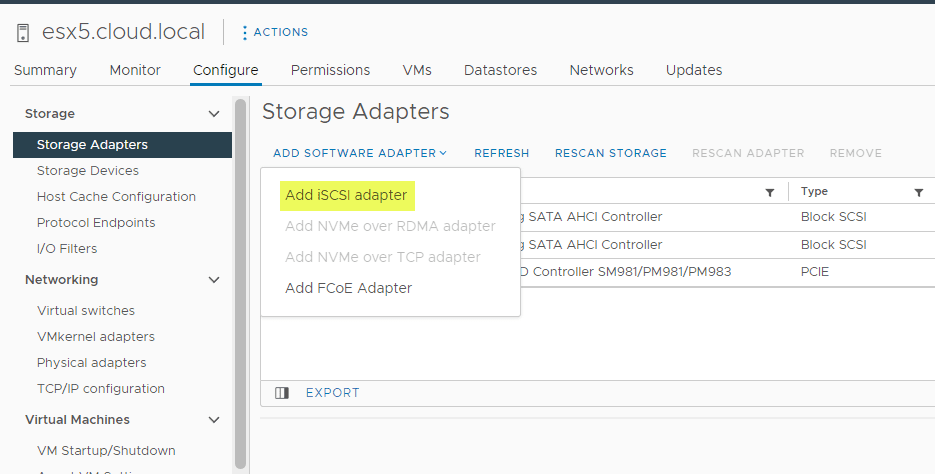
Now that we have added the iSCSI VMkernel port to our ESXi host, we need to add the iSCSI software adapter to the host and connect the VMkernel port to the ISCSI LUN on our Synology. First, let’s add the iSCSI software adapter.
To that, navigate to your ESXi host Configure > Storage > Storage Adapters > Add Software Adapter > Add iSCSI adapter.
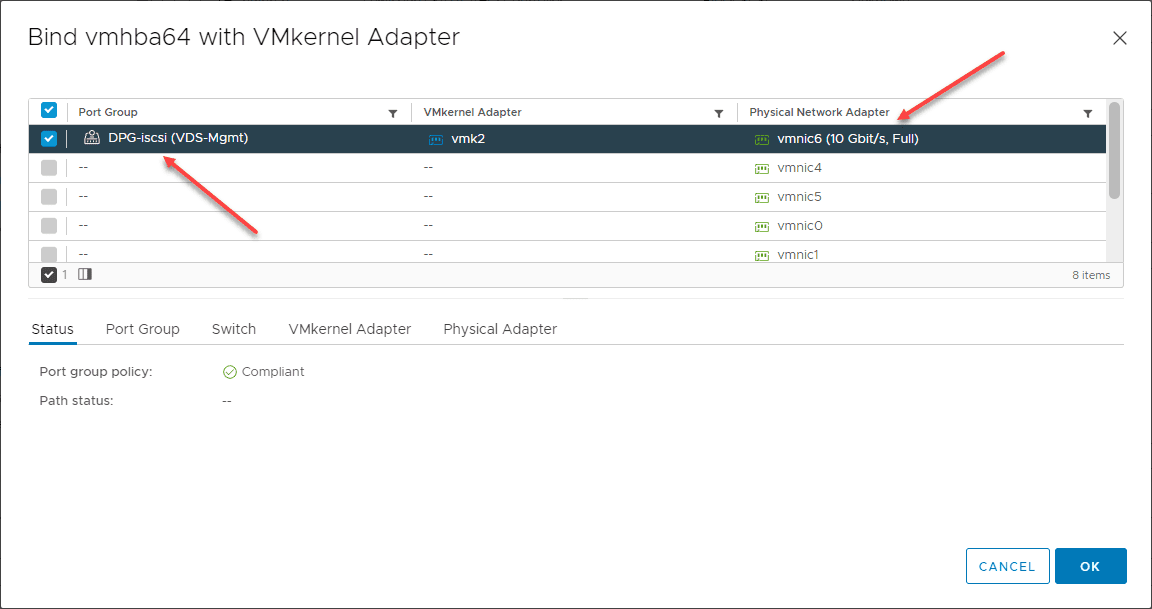
Under Network Port Binding click Add. If things are setup correctly, you should see the VMkernel port listed. Place a check in the box and click OK.
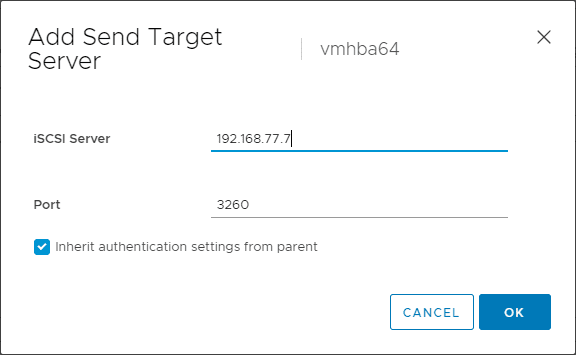
Under the Dynamic Discovery tab, click Add.
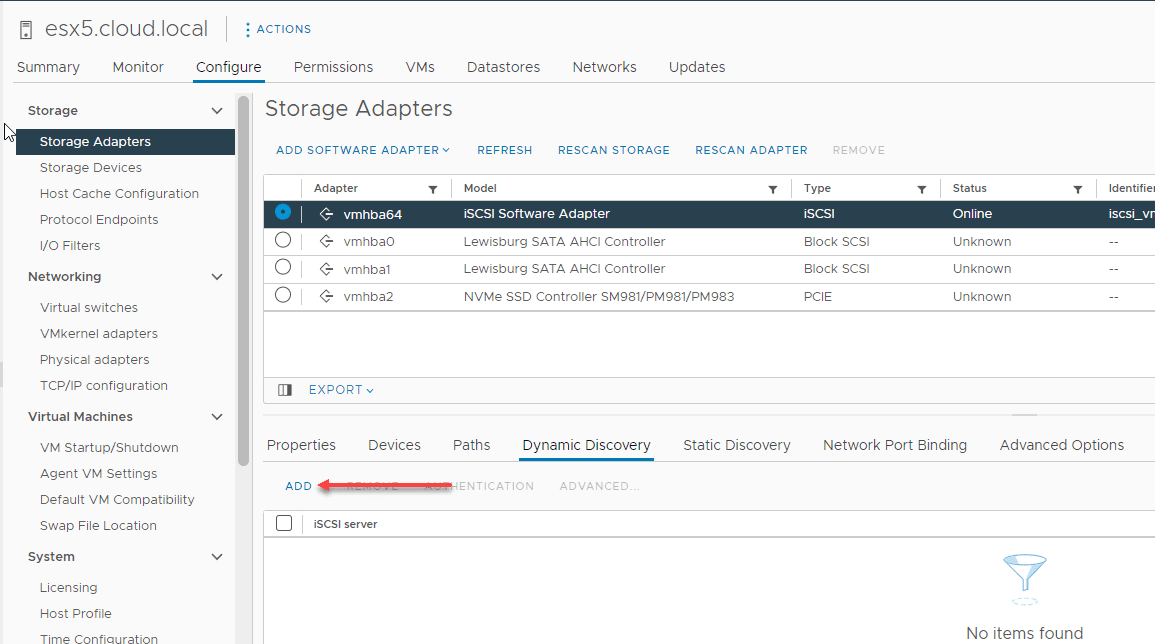
Enter the IP address for the iSCSI LUN on the Synology NAS.
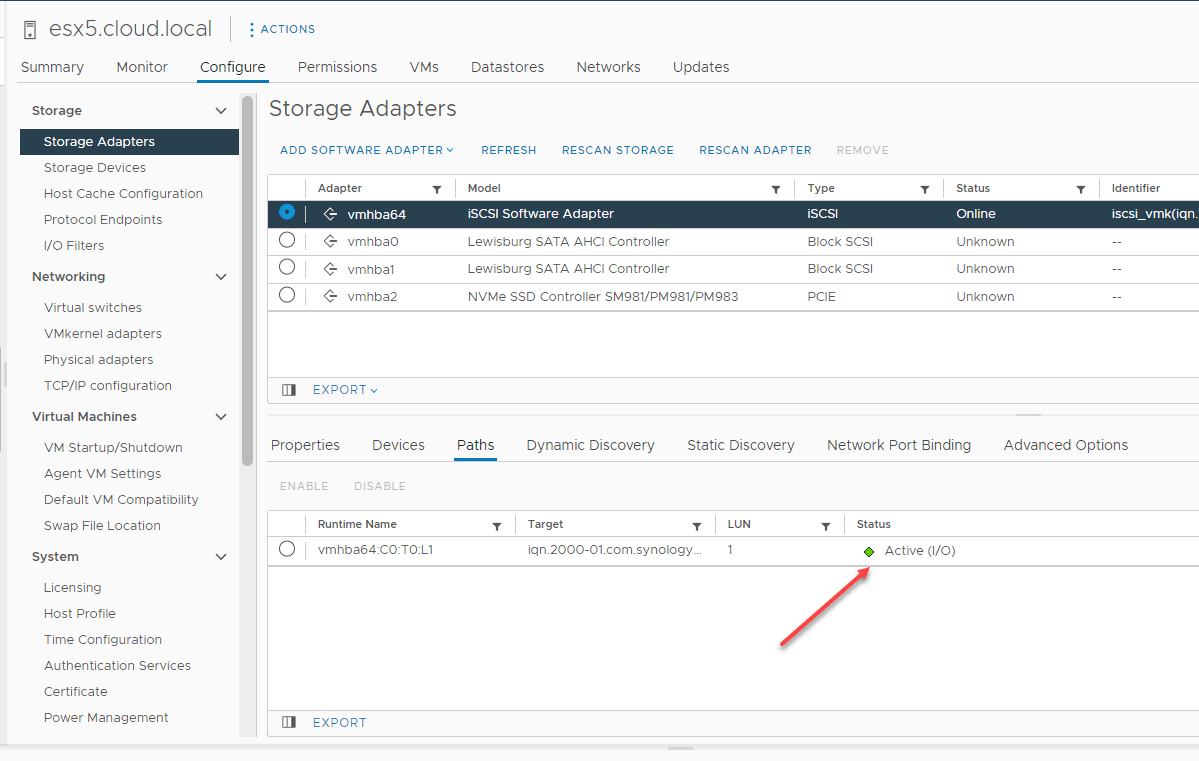
After adding the iSCSI target, you need to Rescan the adapter.

Under the Paths you should see the Synology NAS path listed as Active.
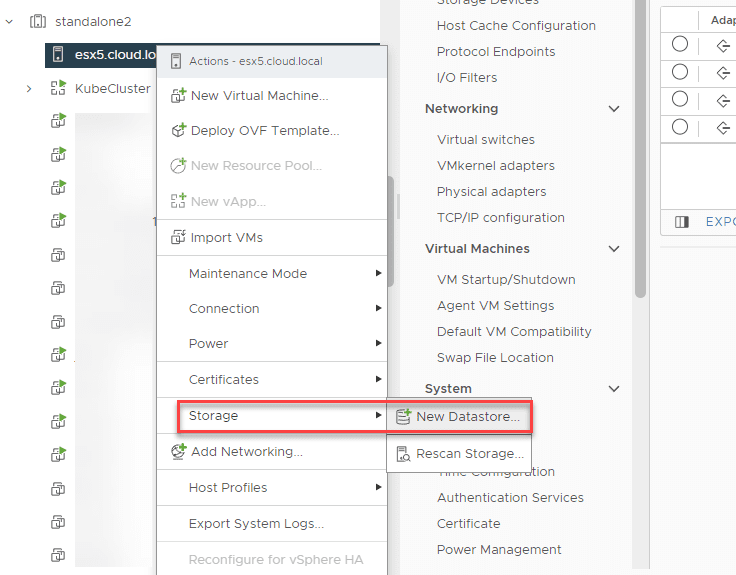
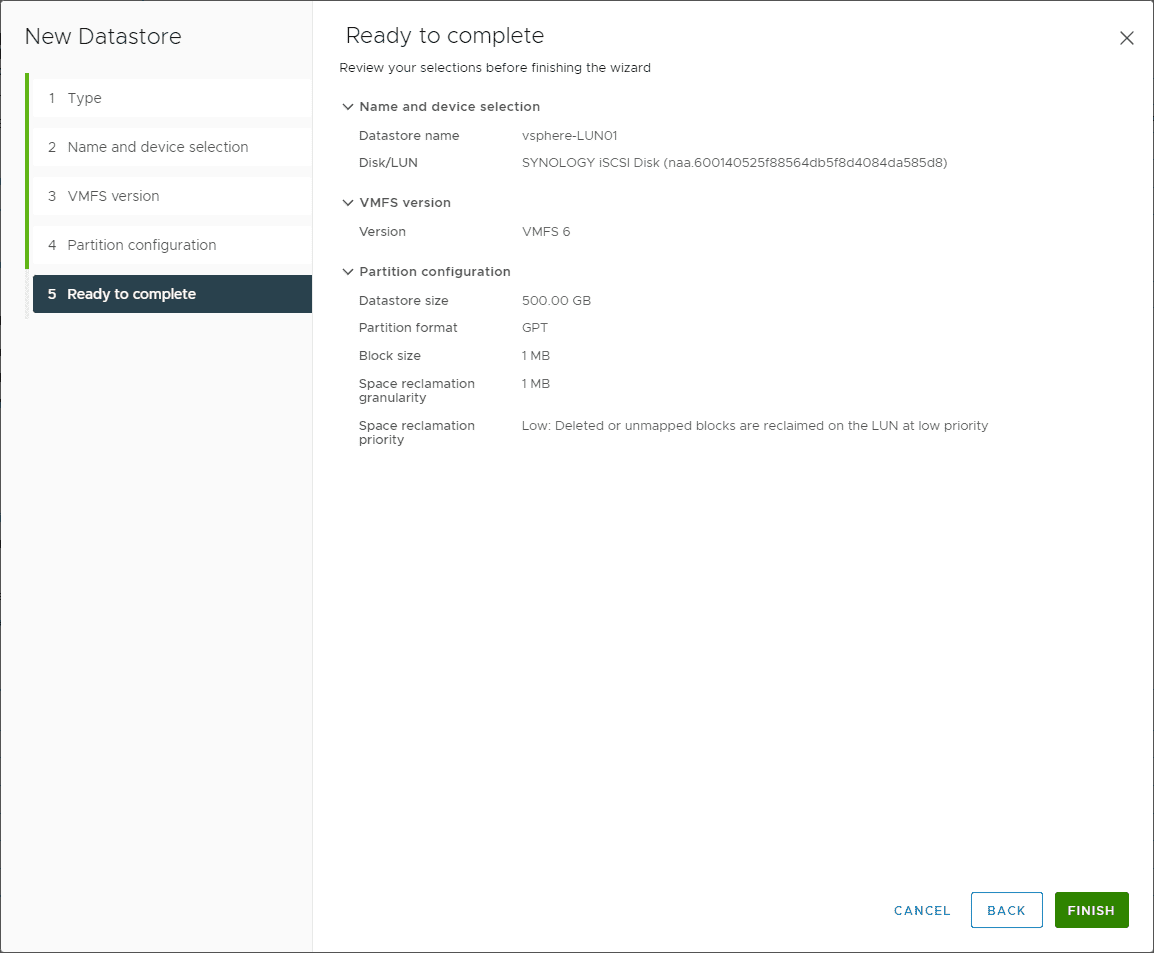
6. Add the new iSCSI vSphere datastore
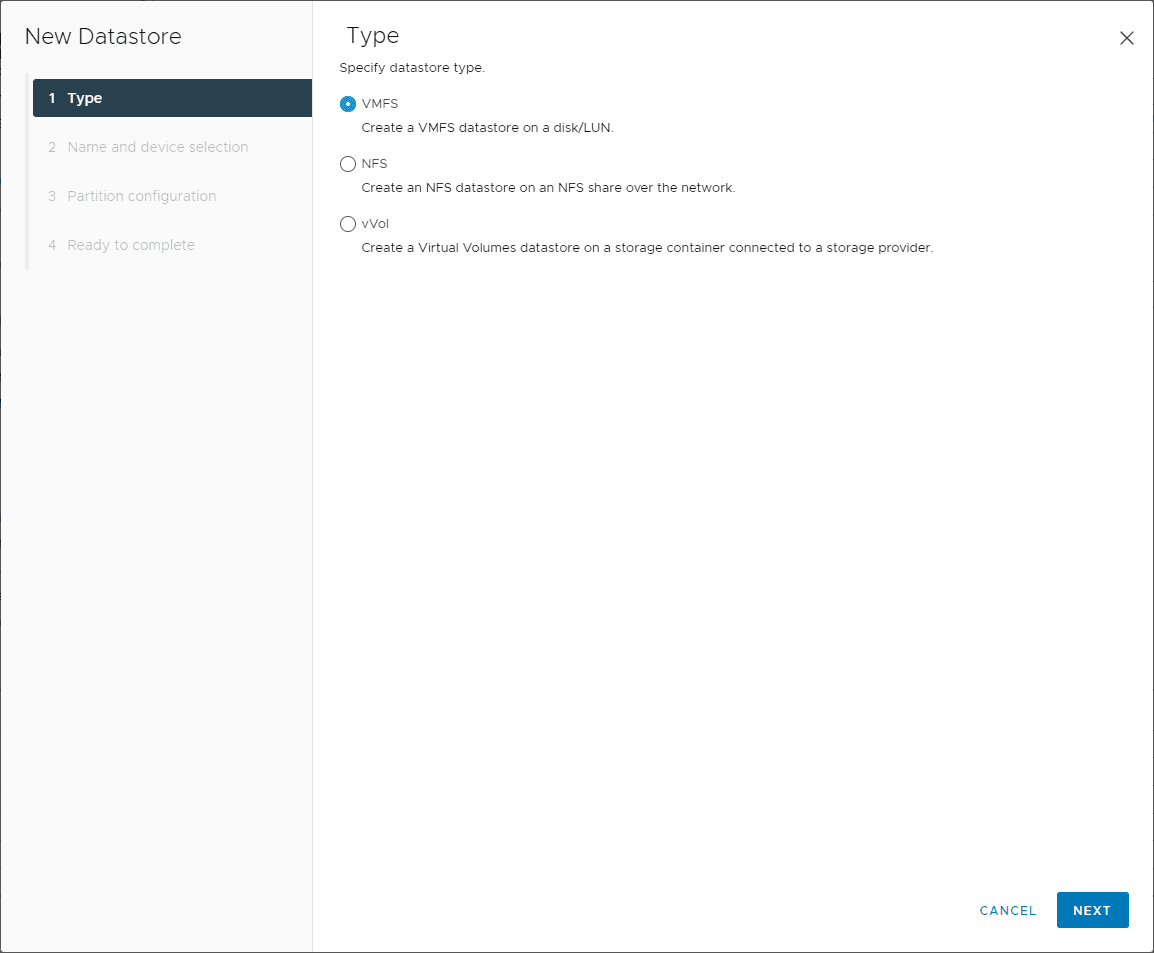
Now that we have the iSCSI Synology path as active, we can add the new datastore to ESXi. Right-click the host > Storage > New Datastore.
Choose VMFS as the type.
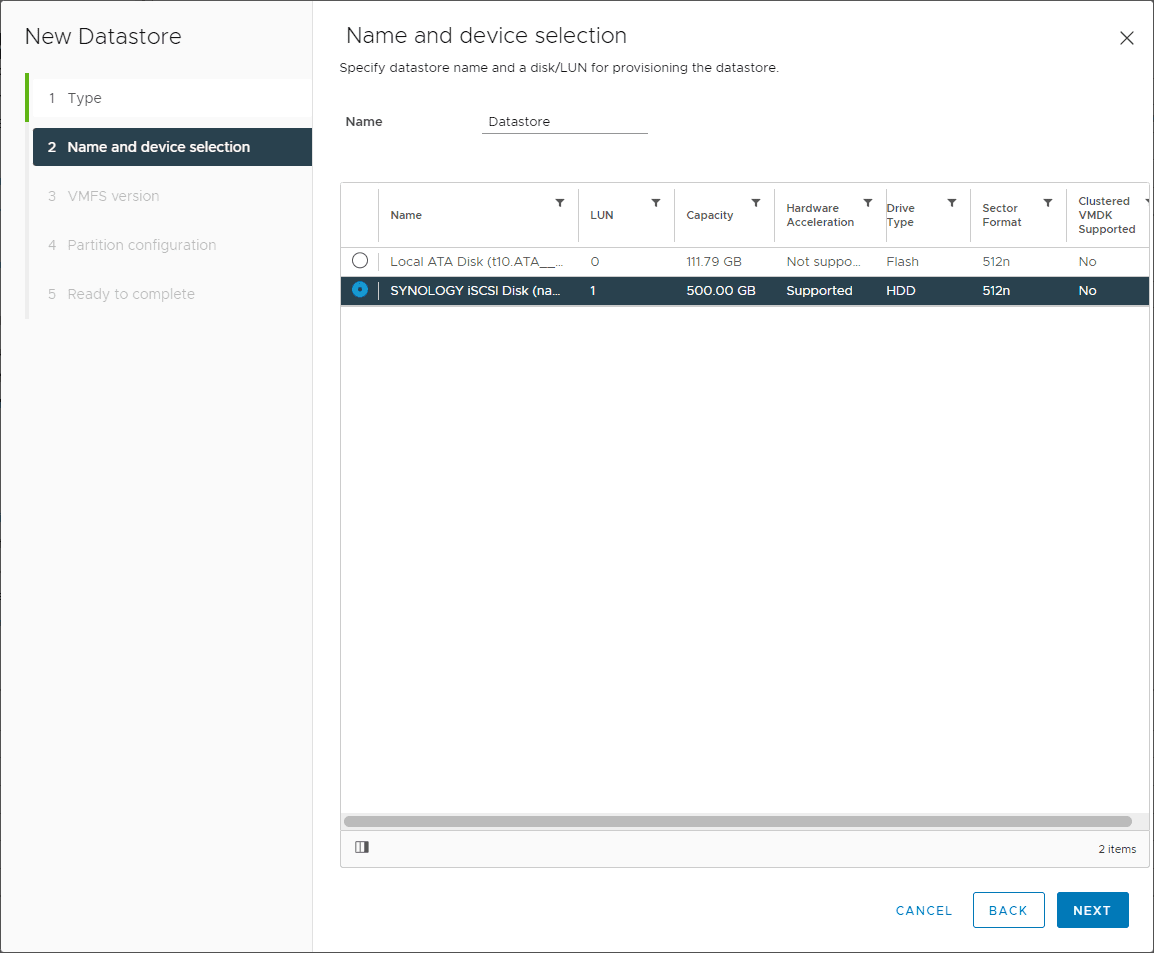
You should see the Synology LUN listed as available storage.
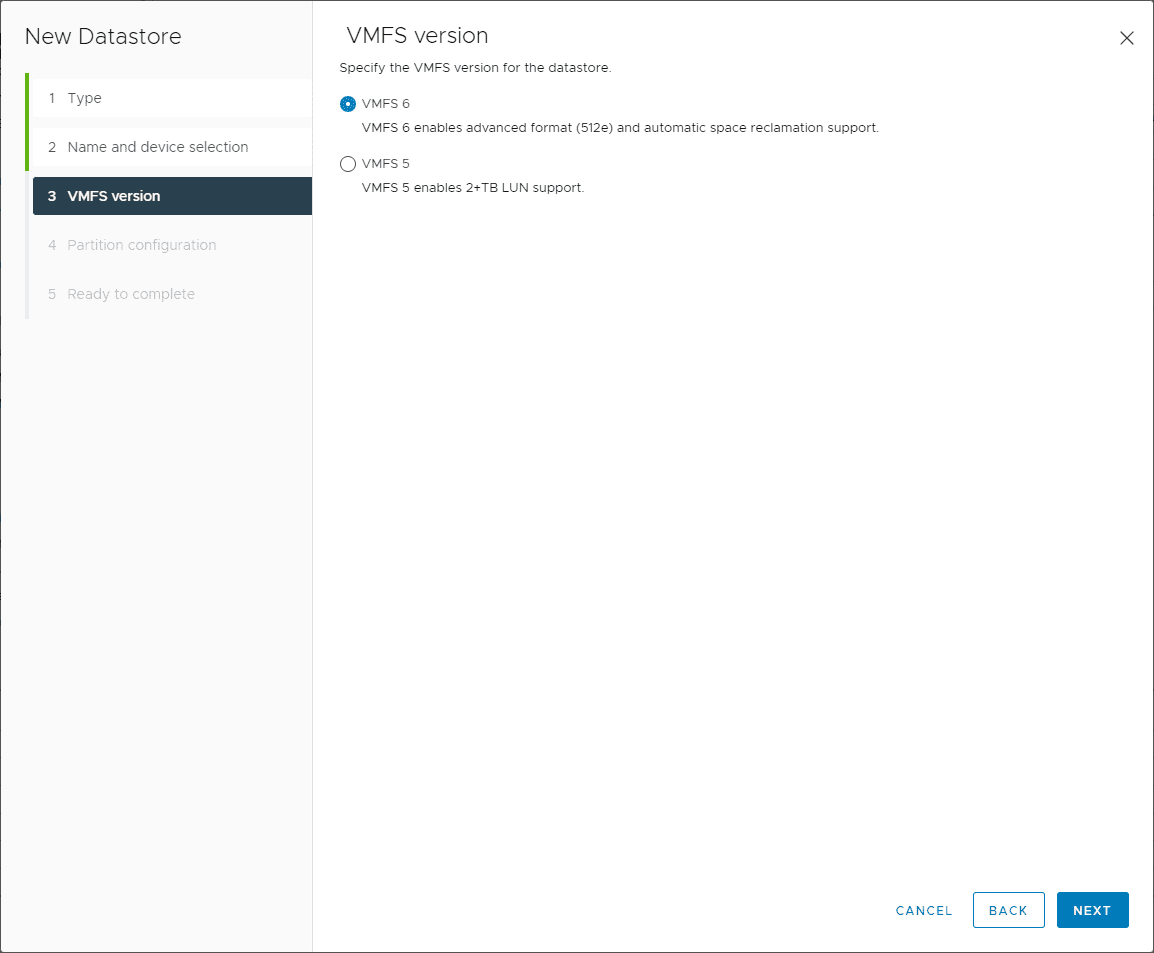
Choose VMFS 6.
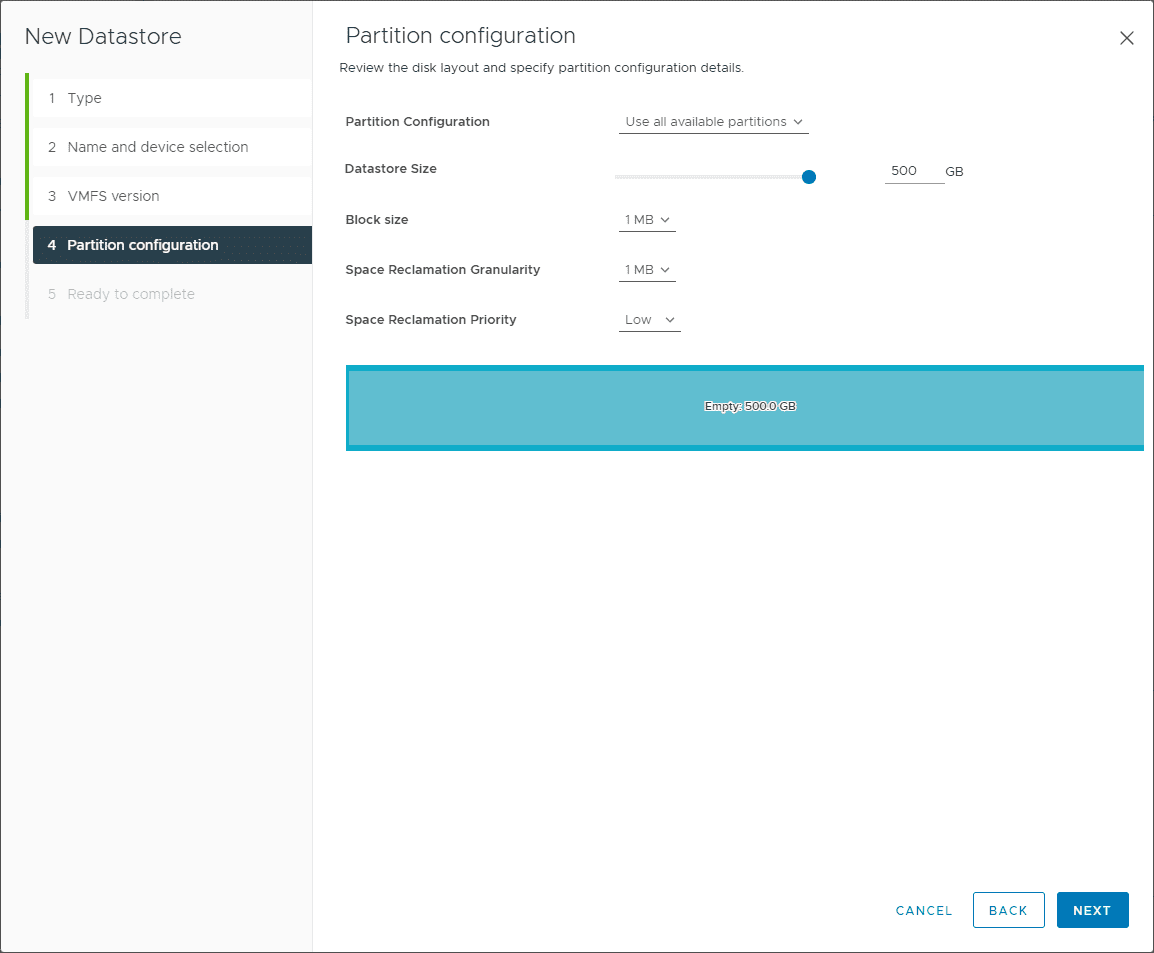
Configure your partition layout. You should just be able to accept the defaults, unless you need to make changes here.
Review the configuration and click Finish.
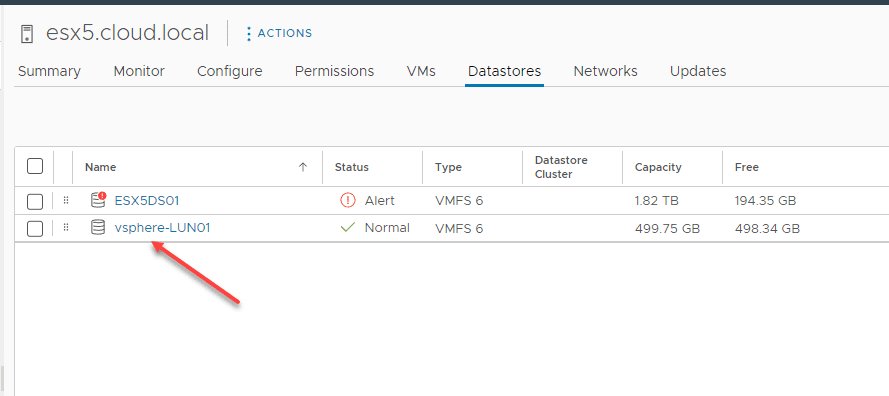
The new datastore is added to the ESXi host.
Concluding
I am anxious to get started playing around with iSCSI in the lab once again and make use of the Synology storage for various use cases. Hopefully, this iSCSI Synology VMware configuration step-by-step walkthrough will help any who are wanting to add a Synology-based iSCSI LUN to their vSphere infrastructure. Really, the steps work for any iSCSI storage. The only part that is different with each is configuring the storage on the vendor side. For ESXi, it works the same.


0 Comments