

A virtual switch allows virtual machines created on Hyper-V hosts to communicate with other computers. You can create a virtual switch when you first install the Hyper-V role on Windows Server. To create additional virtual switches, use Hyper-V Manager or Windows PowerShell. To learn more about virtual switches, see Hyper-V Virtual Switch.
Virtual machine networking can be a complex subject. And there are several new virtual switch features that you may want to use like Switch Embedded Teaming (SET). But basic networking is fairly easy to do. This topic covers just enough so that you can create networked virtual machines in Hyper-V. To learn more about how you can set up your networking infrastructure, review the Networking documentation.
Create a virtual switch by using Hyper-V Manager
Open Hyper-V Manager, select the Hyper-V host computer name.
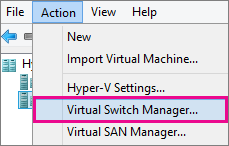
Select Action > Virtual Switch Manager.
Choose the type of virtual switch you want.
Select Create Virtual Switch.
Add a name for the virtual switch.
If you select External, choose the network adapter (NIC) that you want to use and any other options described in the following table.

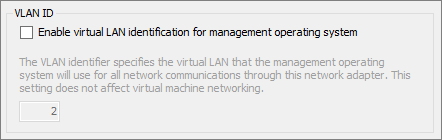
If you want to isolate network traffic from the management Hyper-V host operating system or other virtual machines that share the same virtual switch, select Enable virtual LAN identification for management operating system. You can change the VLAN ID to any number or leave the default. This is the virtual LAN identification number that the management operating system will use for all network communication through this virtual switch.
Click OK.
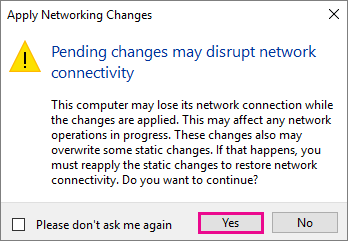
Click Yes.
Create a virtual switch by using Windows PowerShell
On the Windows desktop, click the Start button and type any part of the name Windows PowerShell.
Right-click Windows PowerShell and select Run as Administrator.
Find existing network adapters by running the Get-NetAdapter cmdlet. Make a note of the network adapter name that you want to use for the virtual switch.
Get-NetAdapterCreate a virtual switch by using the New-VMSwitch cmdlet. For example, to create an external virtual switch named ExternalSwitch, using the ethernet network adapter, and with Allow management operating system to share this network adapter turned on, run the following command.
New-VMSwitch -name ExternalSwitch -NetAdapterName Ethernet -AllowManagementOS $trueTo create an internal switch, run the following command.
New-VMSwitch -name InternalSwitch -SwitchType InternalTo create an private switch, run the following command.
New-VMSwitch -name PrivateSwitch -SwitchType Private
For more advanced Windows PowerShell scripts that cover improved or new virtual switch features in Windows Server 2016, see Remote Direct Memory Access and Switch Embedded Teaming.


0 Comments