

I have been playing around a lot with Pi-hole lately. If you are new to Pi-hole and what it can do, take a look at my blog post here on how to Install Pi-hole in Ubuntu 21.04. If you are like me, one of the first things you want to do after you get your Pi-hole installation up and running is secure the web interface with SSL connectivity. It would be great to see this implemented by default in the Pi-hole configuration for it to come out of the box with a self-signed SSL certificate enabled. However, for now, at least, we have to take care of this manually. Let’s take a look at how to configure SSL in Pi-hole using a self-signed certificate.
Why configure Pi-hole with SSL?
Well, it goes without saying that any web interface you are using to administer any system that is critical in your environment and you log into, needs to be configured with SSL. Without SSL, the web interface that you log into to administer the solution (whatever it is) will have the password for your admin user or any other user, sent in cleartext. The security implications of this are dangerous.
Using an SSL certificate, even if it gives an SSL warning with a self-signed certificate, means the communication between your client and the server is encrypted. Any logins and other network communication sent are encrypted and unreadable to an attacker who might try to snoop on your network traffic.
Let’s get started on how to configure SSL in Pi-hole using a self-signed certificate.
Pi-hole uses lighttpd web server
One of the first things you need to understand when enabling SSL on any solution is what web server a solution uses. Each web server type generally has a different process and configuration. If you build up your own Linux server and install Pi-hole, you want to make sure if you have installed Lighttpd, that you have the version compiled with SSL support. I had tried to follow a couple of other posts out there with installing Pi-hole on Ubuntu, and they worked.
However, I found when I tried to enable SSL, it didn’t work as expected and I had errors related to needing to add mod_ssl.so and the module wasn’t found. Long story short, and a few hours of frustration with troubleshooting the missing module, etc, I reinstalled Lighttpd from the Ubuntu repo and everything started working as expected. Be aware of this if you are using another bundle or tool to install Lighttpd.
You can run a quick check on your Lighttpd version and make sure it lists SSL. The command to check the version is:
lighttpd -v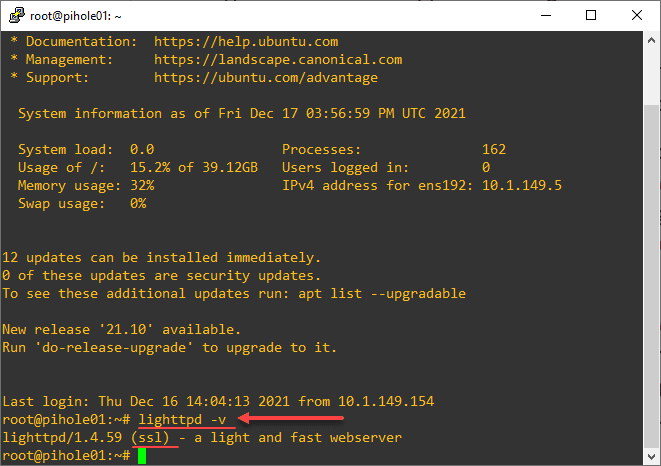
The SSL designation means your server should be able to process SSL requests and you should be good to go. As a note, I used the default Lighttpd in the Ubuntu repo for both Ubuntu Arm (loaded on Pi4) and Ubuntu 21.04 loaded in a VM.
Configure Pi-hole SSL using a self-signed certificate
Now, let’s start configuring Pi-hole SSL using a self-signed certificate. To do that, you need to use the OpenSSL command-line tool to create the files needed for the Lighttpd configuration file.
I want to give a shout-out to “tonymet” on the official Pihole post here: Enabling HTTPS for your Pi-hole Web Interface – FAQs / Community How-to’s – Pi-hole Userspace in the comments section. The whole premise of this linked article is installing a LetsEncrypt certificate. However, as he mentions, most will probably just want to install a self-signed certificate.
The steps are as follows:
- Use OpenSSL to create the key file and crt
- Create the SSL config in the external.conf file
- Restart the Lighttpd server
1. Use OpenSSL to create the key file and crt
The command to create the key file and crt is as follows:
openssl req \
       -newkey rsa:2048 -nodes -keyout pihole01.key \
       -x509 -days 365 -out pihole01.crt
The command above will launch the wizard via command line to enter the certificate
You will need to combine the two into a single file for use with the Lighttpd external.conf file:
cat pihole01.key pihole01.crt > combined.pemI copied this file to the /etc/lighttpd/ssl/ which is a subfolder I created in the lighttpd directory. The location doesn’t really matter here as long as access is given to the files needed.
2. Create the SSL config in the external.conf file
Now that we have the files we need, we can reference the combined file in the external.conf file for Lighttpd. The Lighttpd config file is located at /etc/lighttpd/.
The external.conf file should look like the following:
# Ensure the Pi-hole Block Page knows that this is not a blocked domain
setenv.add-environment = ("fqdn" => "true")

# Enable the SSL engine with a LE cert, only for this specific host
$SERVER["socket"] == ":443" {
	ssl.engine = "enable"
	ssl.pemfile = "/etc/lighttpd/ssl/combined.pem"
	ssl.honor-cipher-order = "enable"
	ssl.cipher-list = "EECDH+AESGCM:EDH+AESGCM:AES256+EECDH:AES256+EDH"
	ssl.use-sslv2 = "disable"
	ssl.use-sslv3 = "disable"
}

# Redirect HTTP to HTTPS
$HTTP["scheme"] == "http" {
	$HTTP["host"] =~ ".*" {
		url.redirect = (".*" => "https://%0$0")
	}
}
3. Restart the Lighttpd server
The final step is to restart the Lighttpd server. This is a simple one-liner:
sudo service lighttpd restartTroubleshooting
There are various items that can come up due to the following:
- Syntax errors
- Wrong files or lack of certificate files in place
- Host file entries needed
I wanted to shed light on a little issue you might run into, which is point three right above. If you see the issue in the screenshot that follows, specifically the error unable to resolve host: No address associated with hostname, this is due to /etc/hosts entries missing.
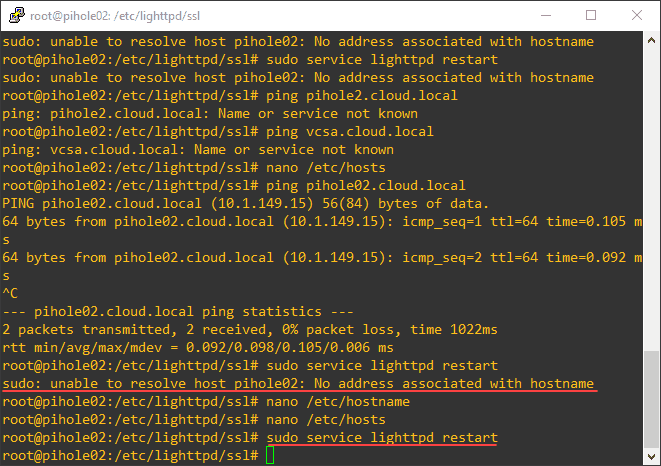
To resolve this issue, edit your /etc/hosts file and add your Pi-hole hostname with the address 127.0.1.1 per the example below.
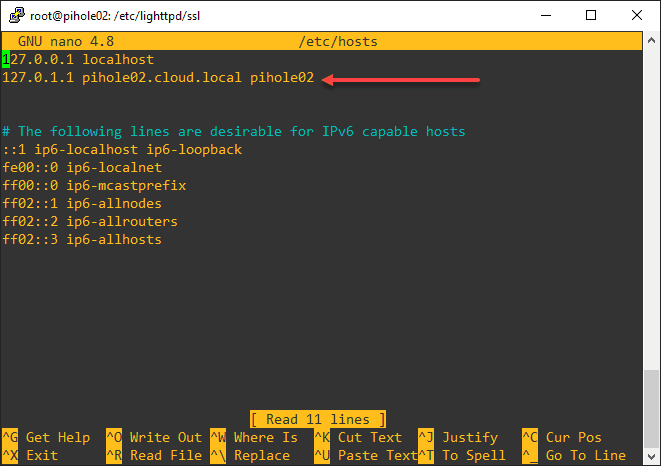
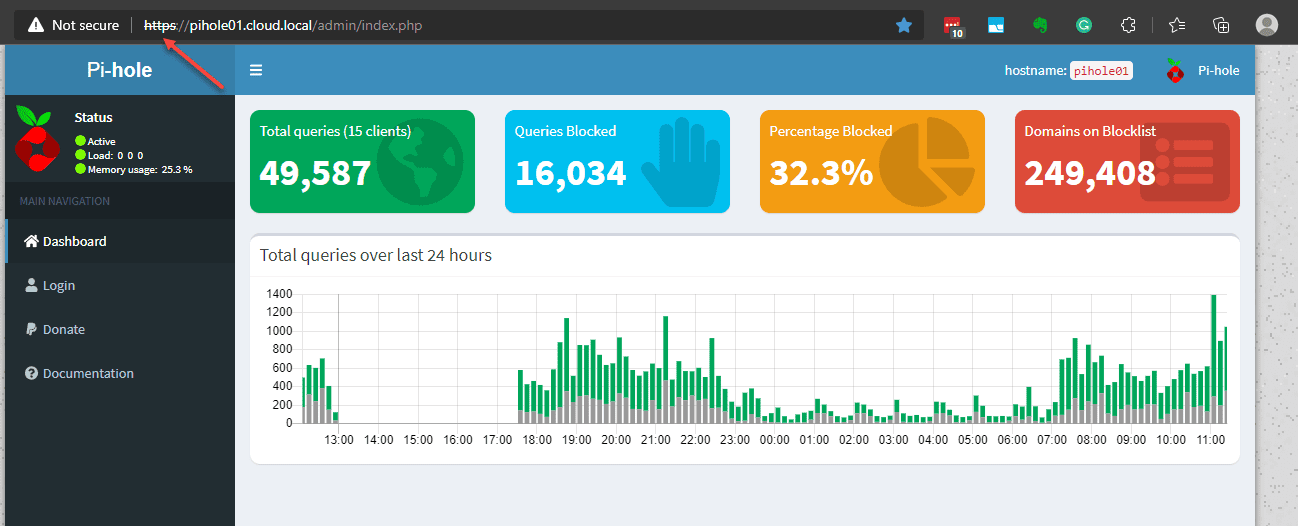
After making the changes to the /etc/hosts file, you should be able to restart the Lighttpd server and browse to the web UI over an HTTPS connection.
Wrapping Up
Hopefully, the process shown to Configure Pi-hole SSL using a self-signed certificate makes sense and is easy to replicate in your environment. My hope is this shortcuts your process to get this implemented and not struggle with some of the examples shown as I did initially. Pi-hole is a great solution. Look for more posts covering getting Pi-hole setup in future posts.


0 Comments