

Monitoring your home automation and devices across the home network is a great way to ensure your devices are functioning correctly. Many have invested in a home generator as standby power for their utility power feeding their homes. Also, if you run a home lab, it is an expensive, but really great investment that helps to ensure you can keep things running in your home network. Generac makes one of the most popular air-cooled generators on the market and they are a popular option for powering your home in the event of utility power being cut. Most likely you will want to monitor your Generac generator for alerts, alarms, status, and other logging. Generac has an app called Mobile Link that you can buy into. However, let’s look at a Generac advanced wireless in-home remote generator monitor that is open-source and can run on a Raspberry Pi device.
Generac Mobile Link App
As mentioned, Generac has a solution that allows remotely monitoring your Generac Generator. It monitors the Evolution controllers that come standard o the Generac generators. The Evolution Controllers have Wifi built-in, at least on the Evolution 2.0. So, out-of-the-box, you can connect your Generac generator to your home wireless network.
Mobile Link comes pre-installed with most 2008-and-newer air-cooled standby generators and 2018-and-newer Guardian Series air-cooled standby generators from Generac. There is a Mobile Link setup app that you use to setup the Wifi connection on Evolution controller to Mobile Link. Then, you use the Mobile Link app to monitor your generator.
Limitations and cost: The Mobile Link service is a $50 a year cost and has limitations to note. The app is VERY basic. You basically can see the status of the generator, get emails and texts when it exercises and see if there are faults on the unit. However, there is no additional configuration or controls available on the official Mobile Link app.
You can check out the official information covering Mobile Link here:
Genmon – opensource alternative for Generac Advanced Wireless in-home Remote Generator Monitor
Let me introduce you to Genmon which is an open-source alternative for a Generac advanced wireless in-home remote generator monitor. It is a project available on Github, written in Python that runs on a Raspberry Pi device. You can download the project here:
To use the Genmon project, you simply need to install a Raspberry Pi device with Raspberry Pi-OS, Ubuntu, or another Linux release, install the project, connect to your Evolution controller, and then you get a myriad of features, no available with the official Mobile Link app.
Features include the following from the Github page:
- Monitoring of the generator to to detect and report the following:
- Maintenance, Start / Stop and Alarm Logs (No Maintenance log exist on Nexus or Industrial Gens)
- Display Generator Serial Number
- Generator warnings and faults
- Generator Status:
- Engine State
- Generator Switch State (Auto, On, Off)
- Generator Engine State (Stopped, Starting, Exercising, Running Manual, Running Utility Loss, Stopped due to Alarm, Cooling Down)
- Battery Voltage and Charging Status
- Relay Output State: (Starter, Fuel Relay, Battery Charger, others for liquid cooled models)
- Engine RPM, Hz and Voltage Output
- Generator Controller Time
- Line State
- Utility Voltage Level
- Transfer Switch State (Evolution liquid cooled model and Industrial Gens with HTS/MTS/STS Transfer Switches models only)
- Outage Information
- Time since last outage
- Current Utility Voltage
- Min and Max Utility Voltage since program started
- Maintenance Information
- Weekly Exercise time, day (biweekly and monthly if supported by your generator)
- Hours till next scheduled service
- Total Run Hours
- Firmware and Hardware versions
- Various statics from the generator monitor including time since program launched, MODBUS / serial communications health and program health.
- Engine State
- Email notification of :
- Engine state change
- Switch state change
- Critical or Warning messages from the generator
- Web based application for viewing status of the generator
- Limited and Full Rights login for web interface
- SMS notifications of Generator state and power outages (via Twilio SMS API or Expansion Cellular Modem)
- Push notifications (via pushover.net)
- syslog logging of generator events
- Command Line application (all the functionality of email).
- Ability to set exercise time
- Ability to set generator time
- Ability to start, stop, exercise and start / active the transfer switch (i.e. power your house off the generator) remotely.
- Power, Current output on selected models
- Fuel consumption on selected models
- MQTT integration for third party home automation support
- Service Journal for logging maintenance, repair, etc
- Backup configuration files
- Enhanced Exercise options for Evolution/Nexus controllers (Exercise Transfer Switch)
- Optional low bandwidth URL (http://ipaddress:8000/low)
- Firmware update notification for Evolution 2.0
- SNMP monitoring
- Optional LDAP authentication to web interface
One of the great things if you notice from the features is the ability to start, stop, exercise and start and active transfer switch. So, you can control your generator from your remote monitor which is really cool.
Installing your Raspberry Pi for use with Genmon
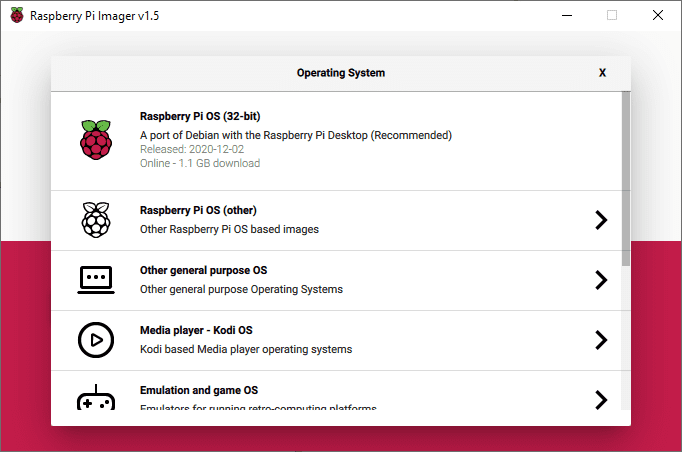
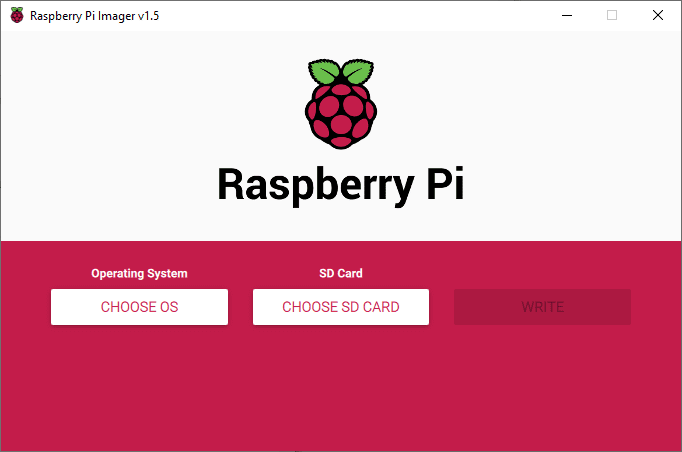
I am not going to post every screenshot here on how to install Raspian and options. However, there are a few things to be sure to enable when you setup your Raspberry Pi, including SSH, and Wireless connectivity. For my installation, I used a Raspberry Pi 3b with wireless. You can use the Raspberry Pi Imager v1.5 utility to image your SDcard for use in your Raspberry Pi device for genmon.
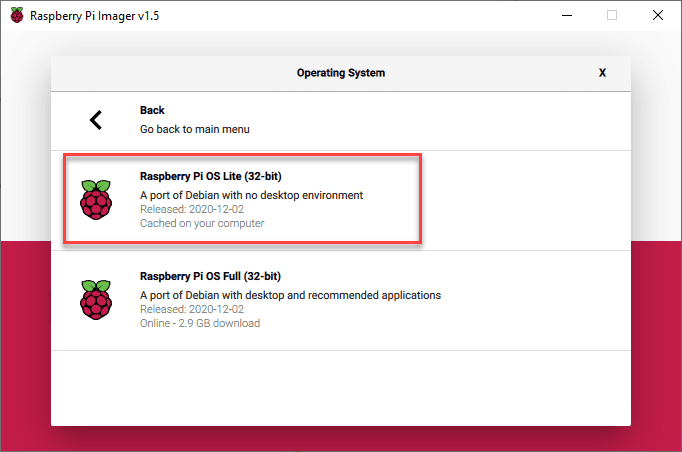
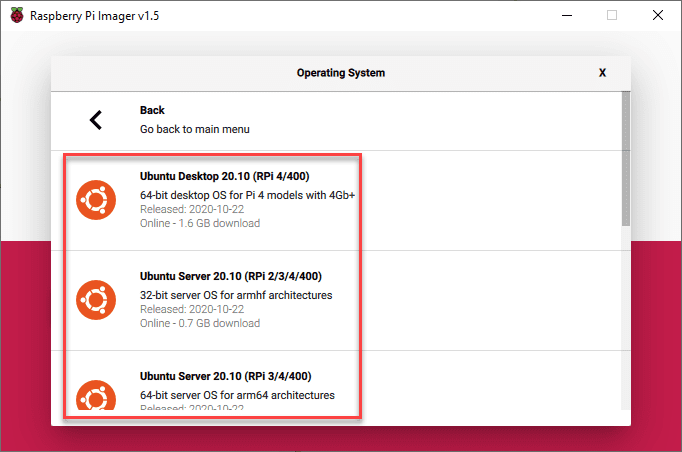
You can also use an Ubuntu distribution.
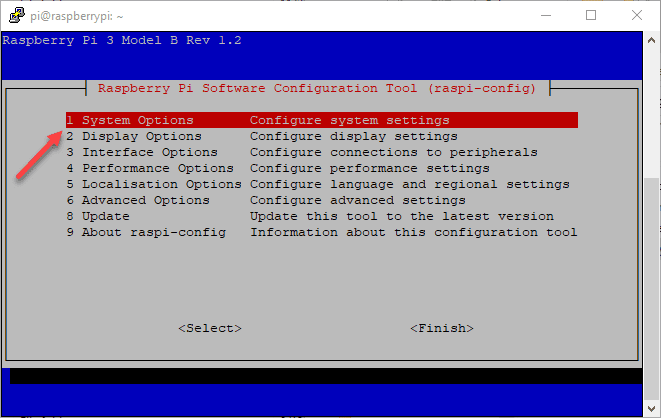
In Raspian configuring system options.
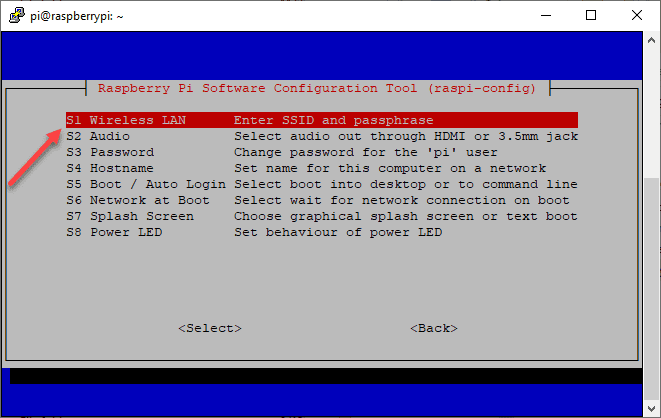
Configuring your Wireless LAN.
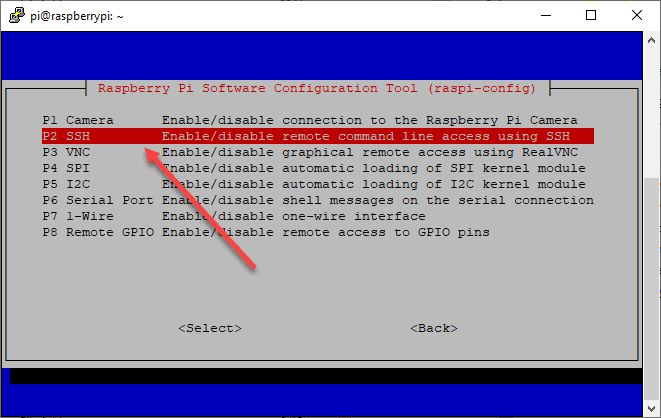
Configuring SSH to enabled and persistent.
Taking note of your WLAN connection.

Apply your wireless configuration once you know the wireless adapter name:
This file is generated from information provided by the datasource.  Changes
 to it will not persist across an instance reboot.  To disable cloud-init's
 network configuration capabilities, write a file
 /etc/cloud/cloud.cfg.d/99-disable-network-config.cfg with the following:
 network: {config: disabled}
 network:
     ethernets:
         eth0:
             dhcp4: true
             optional: true
     version: 2
     wifis:
         wlan0:
             optional: true
             access-points:
                 "Your SSID":
                     password: "SSID Password"
             dhcp4: true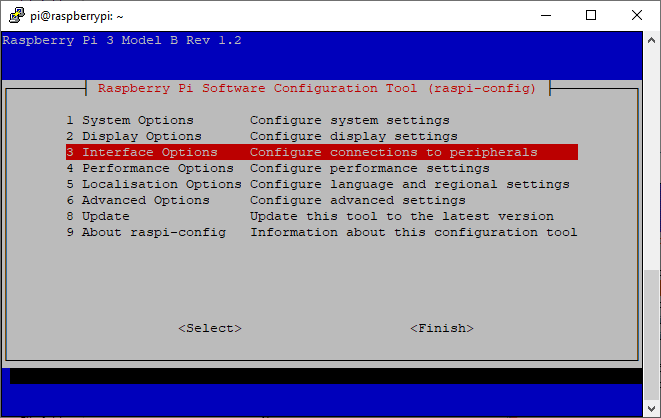
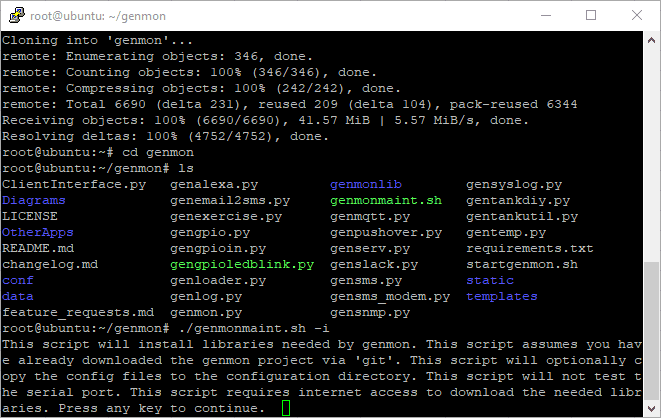
Cloning the Genmon repo and running the install script.
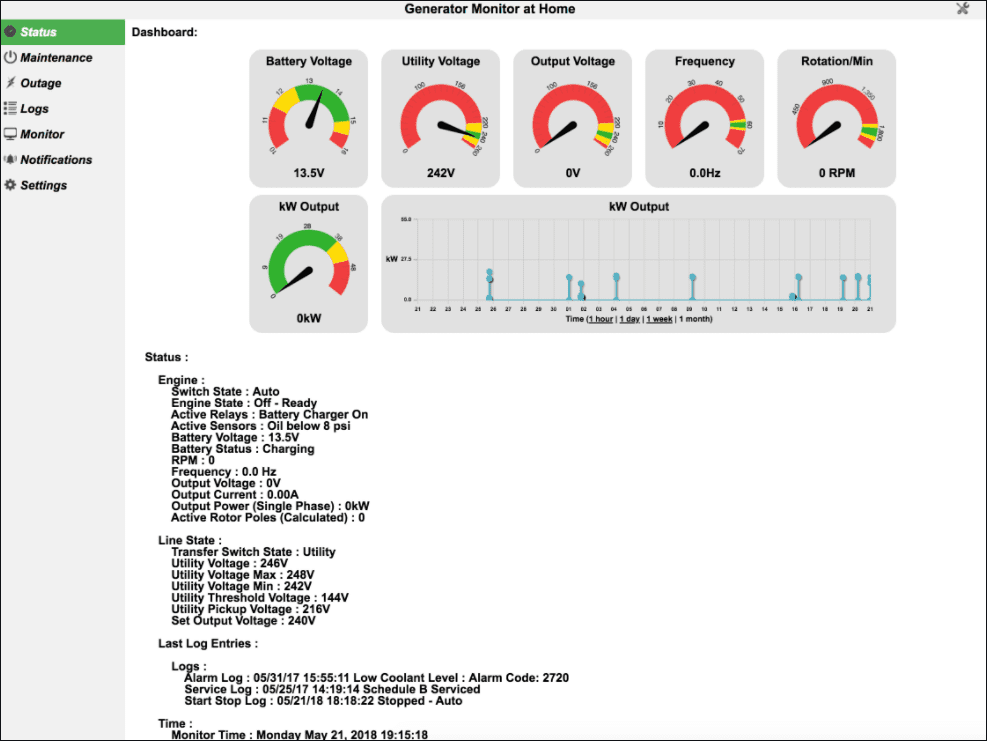
The web interface is informative and intuitive. You can easily enable SSL and also two-factor authentication in the later/latest release of Genmon.
Additional hardware to make hooking up to your Generator easy
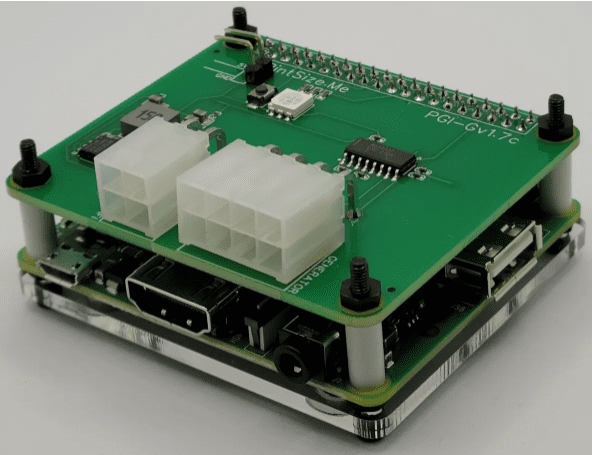
I tried to put some pieces and parts together to hook up my Genmon Pi device to the Evolution controller. However, I will save you the headache of doing this yourself. There is an online vendor that has reasonably priced plug-and-play modules to hook up to your Pi and then to your Evolution controller as well as the cable you need. Do yourself and favor and buy this from them. It is way easier and will save you from hours of troubleshooting connectivity.
One of the great things about the HAT below, it allows you to loop in the Raspberry Pi for Genmon AND connect the Mobile link wireless as well. This way you are essentially monitored from the (2) devices instead of just Genmon or Mobile Link. So, I really like that aspect of the HAT.
When you check out, you will be asked the length of the cable you need to mount your Pi and hook up to the Evolution controller. They have a 1-meter option that provides additional length.
Wrapping up
If you are looking for a Generac Advanced Wireless in-home Remote
Generator Monitor to monitor your Generac generator, the Genmon tool is
perfect. It is open-source, provides way more features than the Mobile
Link app and is free to download. You just need a Raspberry Pi, the
Generator HAT, a cable, and a little bit of time to set it up.


0 Comments