

One of the things you may find the need for from time to time is customizing an ESXi ISO image to add drivers for detecting storage, network adapters, and other components. This is especially true if you are running a VMware home lab environment with commodity hardware. Let’s take a look at how to use ESXi Auto Deploy add driver to ESXi ISO custom image. This built-in functionality provides an easy way right from the vSphere Client to create a custom ESXi ISO image with the drivers you need.
What is ESXi Autodeploy?
Creating a custom ESXi ISO image is only a small part of what vSphere Auto Deploy. The vSphere Auto Deploy functionality can provision hundreds of physical hosts with ESXi images and you can specify the image you want to deploy onto which hosts. You can also specify host profiles to apply to the hosts, vCenter Server location, and script bundle to run.
vSphere Auto Deploy uses PXE boot in conjunction with vSphere host profiles to provision and customize an ESXi host. No state data is stored on the ESXi host as Auto Deploy manages this.
ESXi Auto deploy add driver to ESXi ISO custom image
This is scratching the surface of what ESXi Auto Deploy can do. However, one of the cool things you can use ESXi Auto Deploy for is creating a custom ESXi ISO. One of the tasks that you may need to do before getting started with ESXi Auto Deploy is starting the required vCenter Server services, as these are set to manual by default.
Starting and setting the required services in vCenter to Automatic
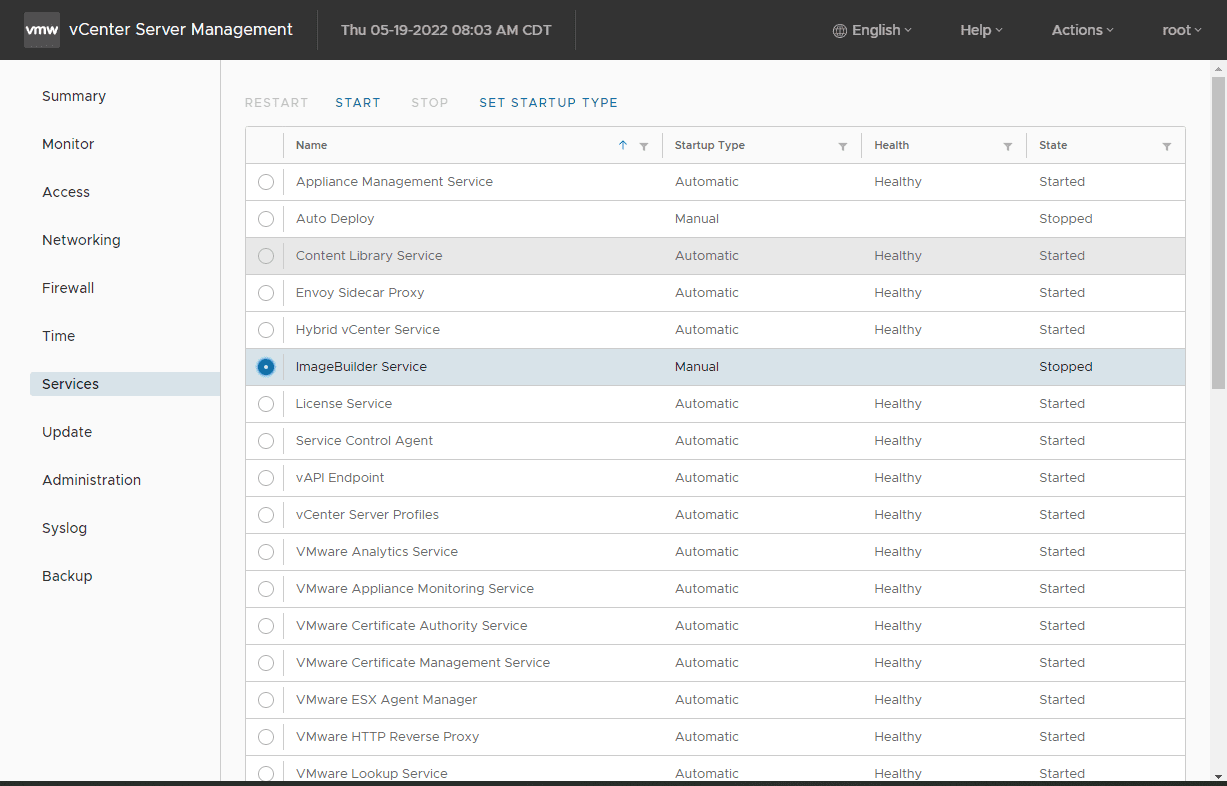
Below the ImageBuilder Service is set to Manual and Stopped by default.
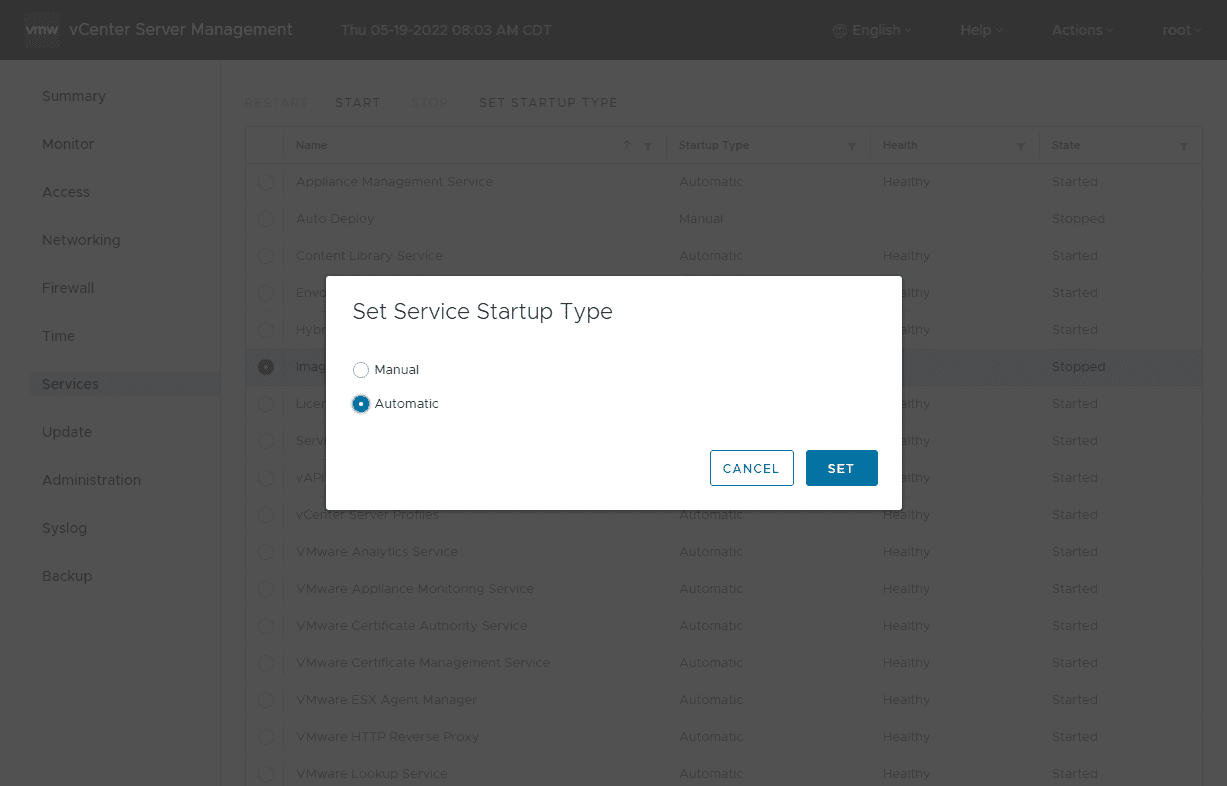
Setting the service to Automatic and starting the service.
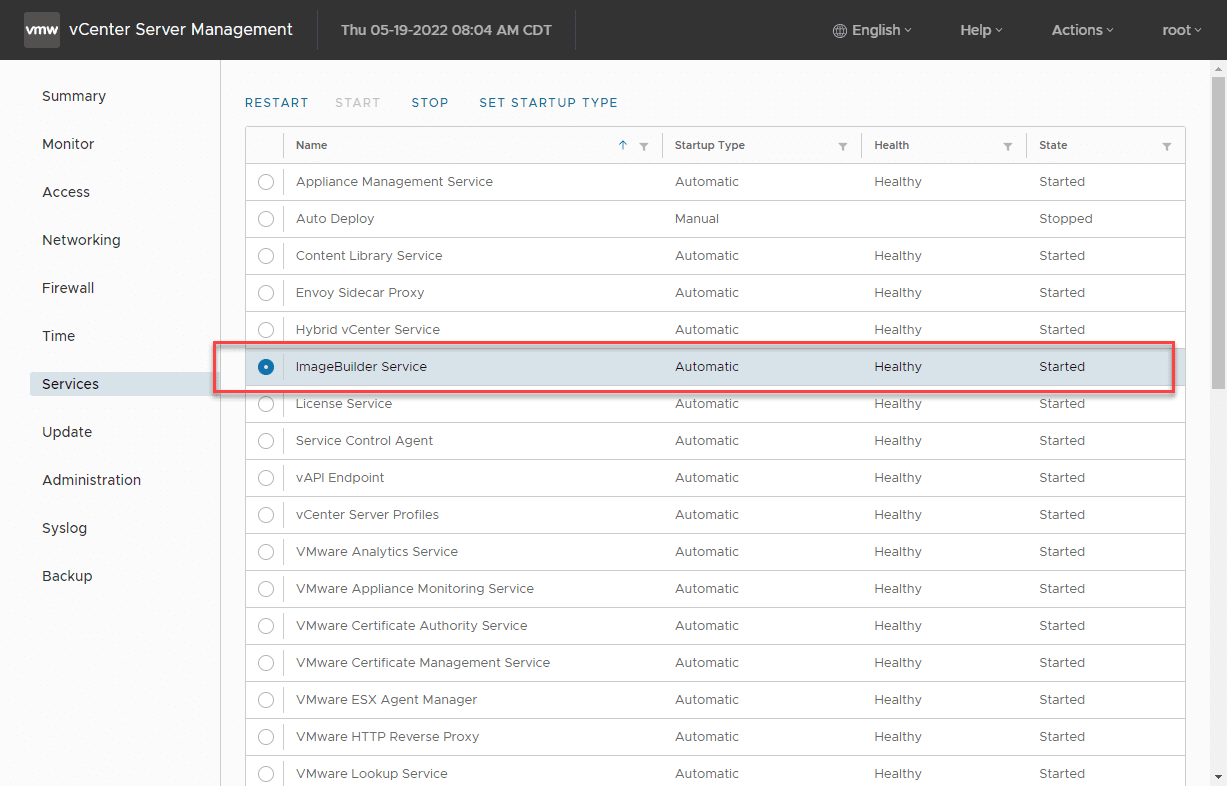
The service is started and ready to use.
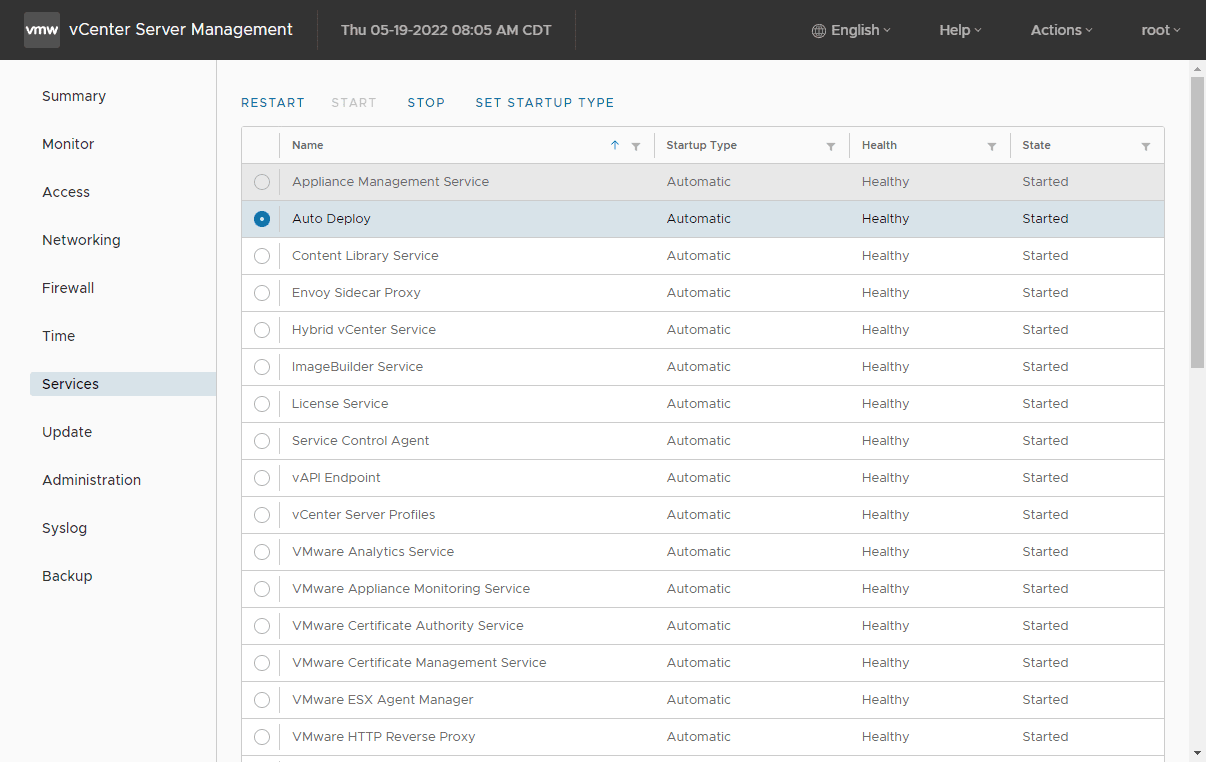
The same goes for the Auto Deploy service. Below, it is set to Started and Automatic.
Adding a new Software Depot in Auto Deploy
The first step you need to take is to create a new Software Depot. You can think of this as a container that will hold your customized files.
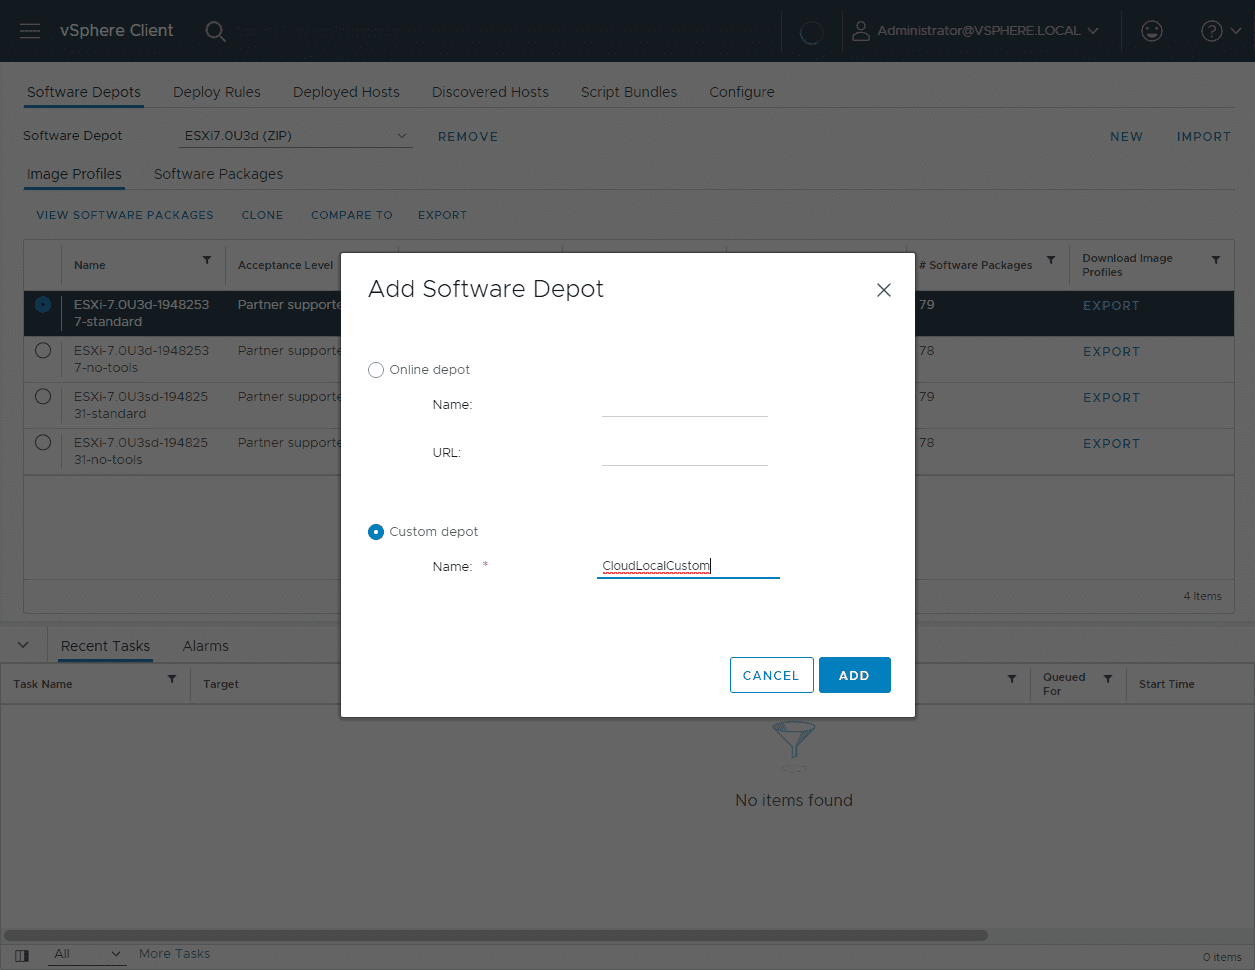
Once we have the custom Software Depot, we can add the bundles we need.
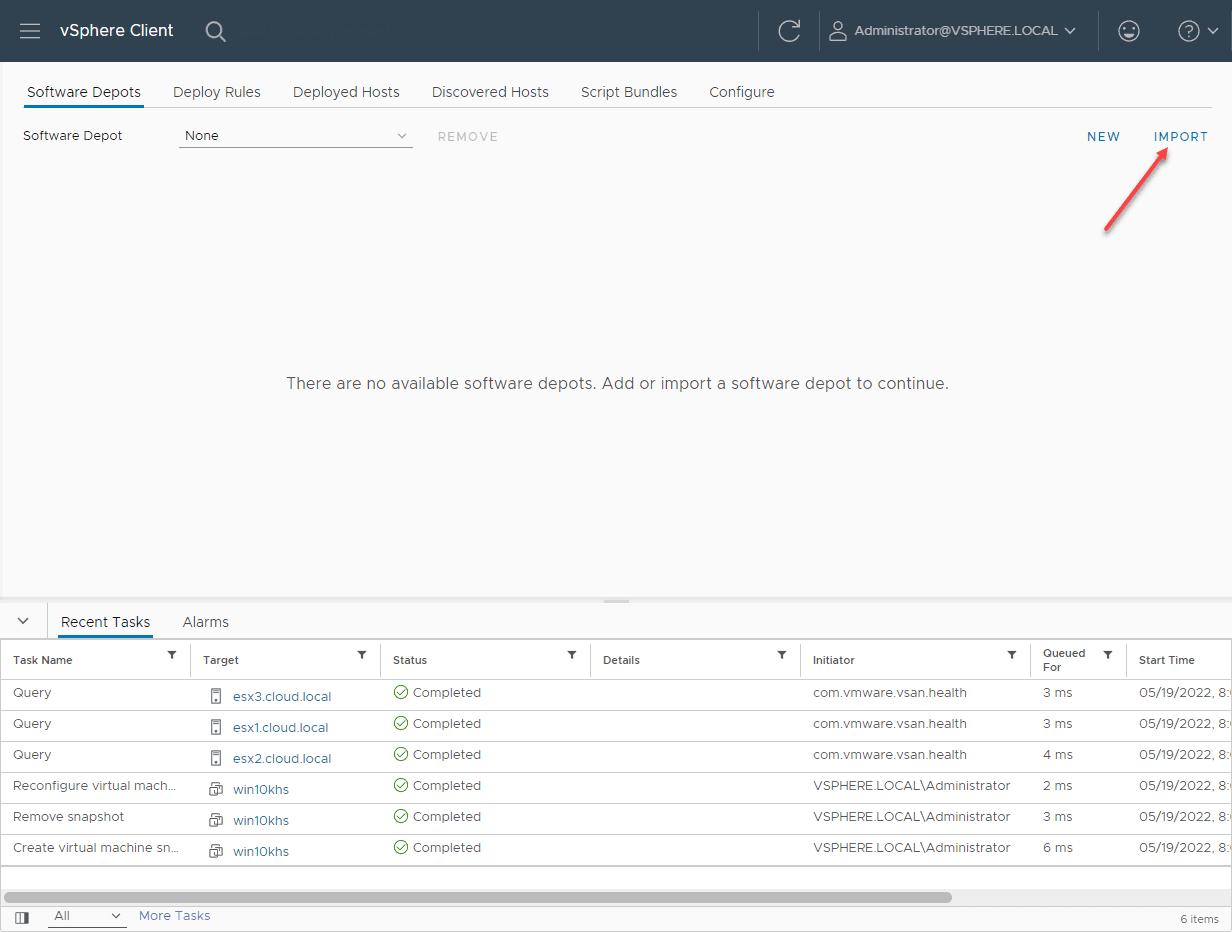
Import both the patch baseline image and your ESXi drivers
Next, you need to import two different bundles:
- The patch baseline image
- The drivers bundle you want to use
Click the Import button in the upper right-hand corner.
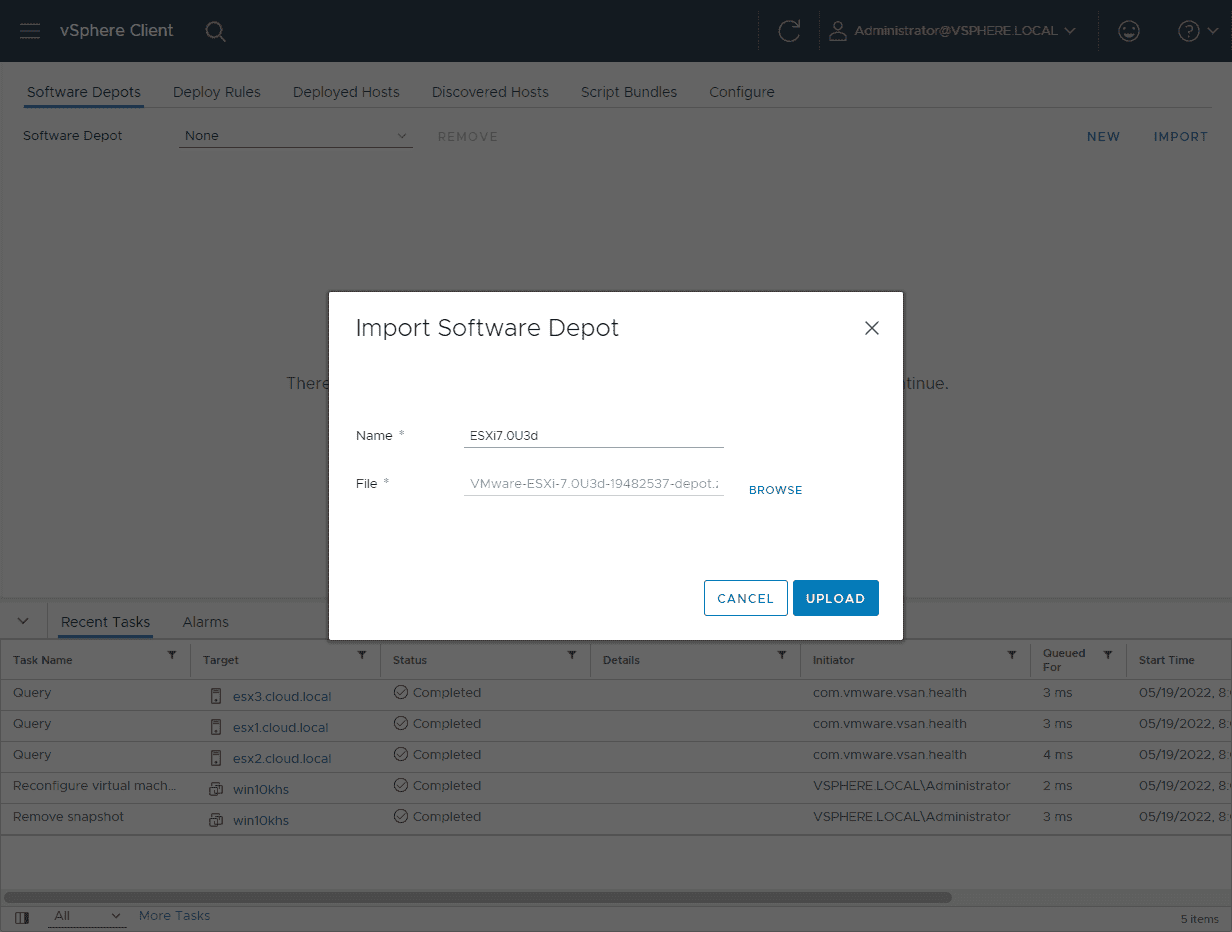
The Import Software Depot dialog will pop up. Give the bundle a name and browse to the file to upload. First, I am uploading the latest patch depot file for ESXi 7.0 Update 3d.
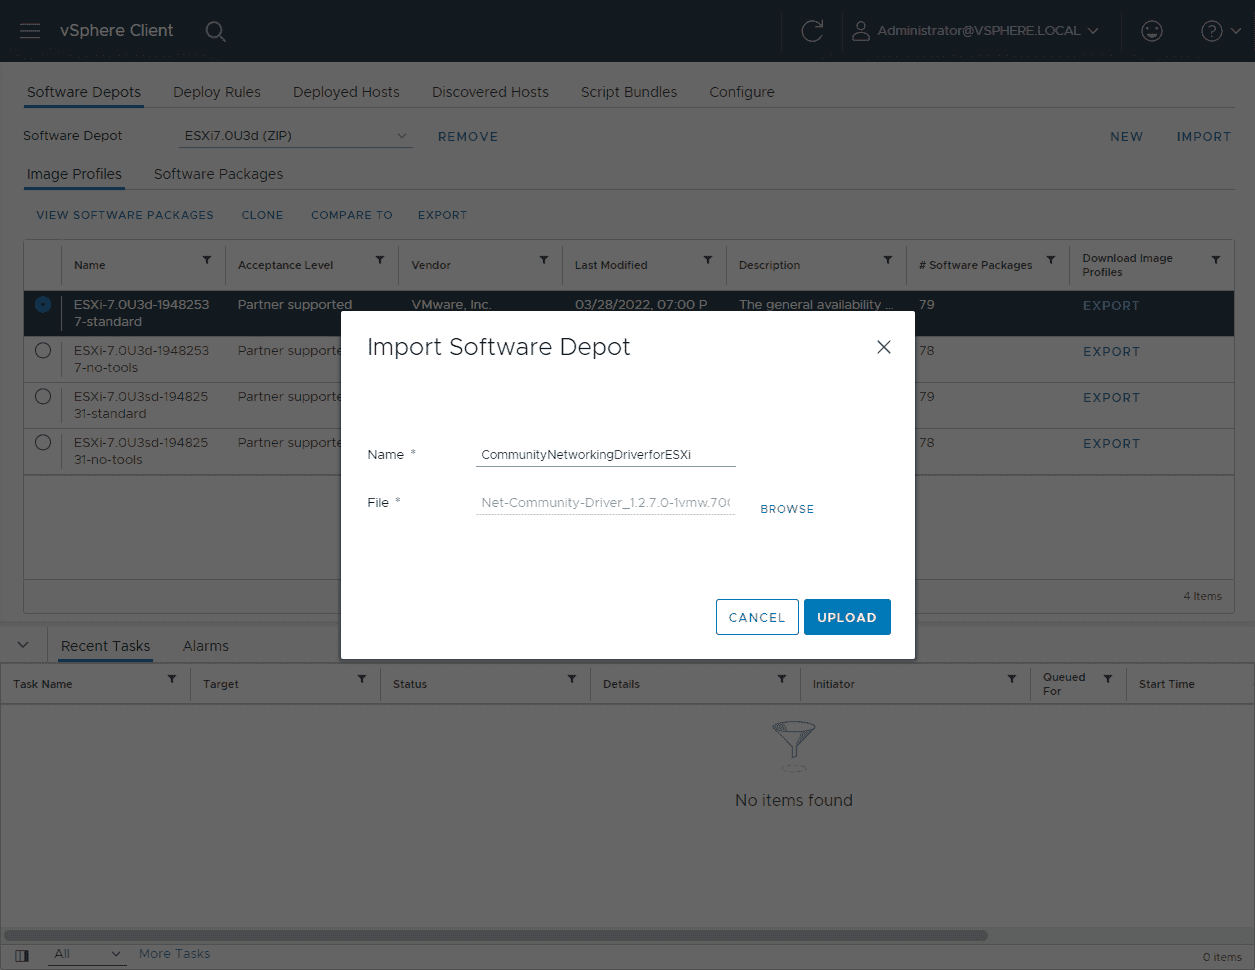
Next, I will upload the Community Networking Driver for ESXi, which you can download on the VMware Fling page here: Community Networking Driver for ESXi | VMware Flings
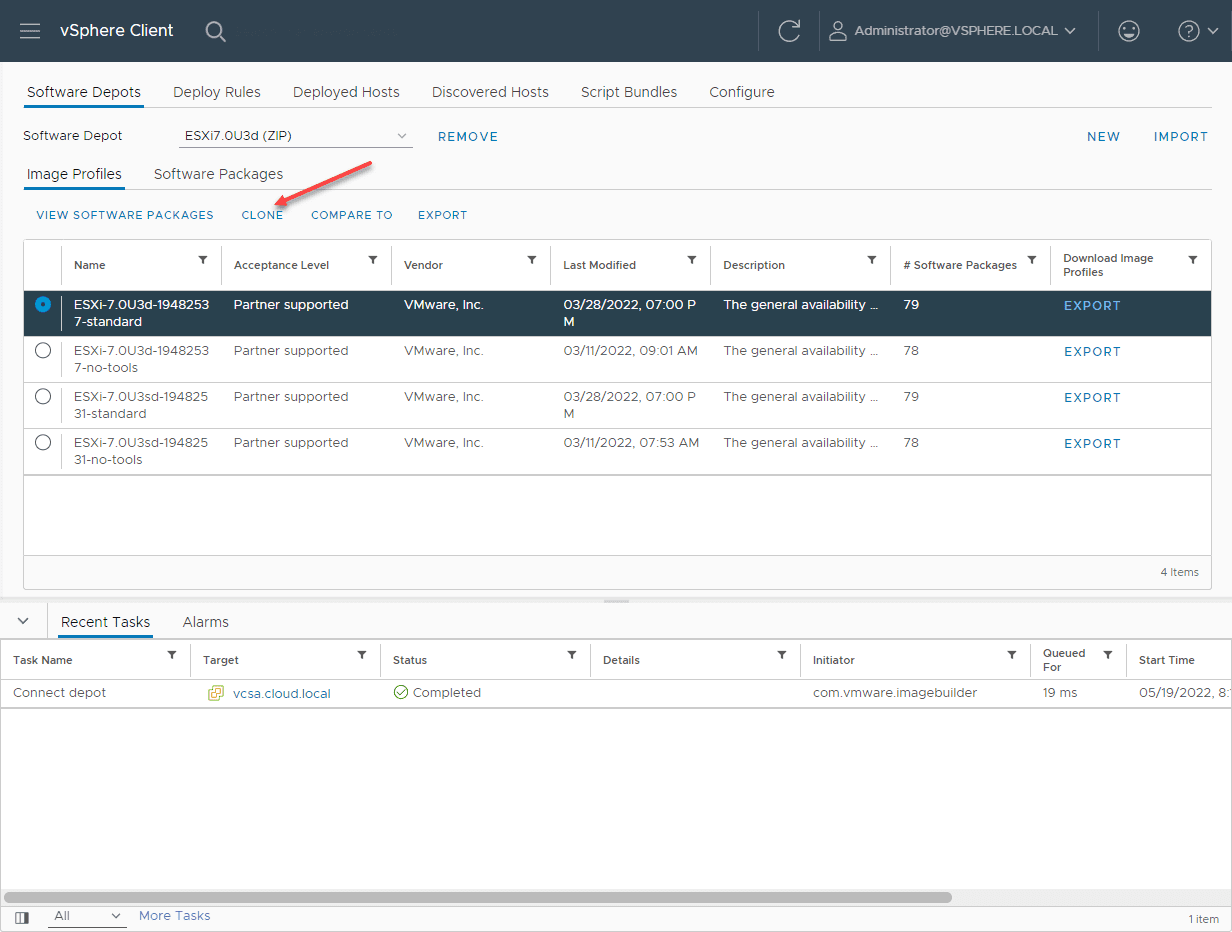
Clone your base image Software Depot
The next step is to clone the base image Software Depot that you uploaded. Again, I used the latest patch bundle for ESXi 7.0 Update 3d. By cloning, you can customize the files included which is what we want to do.
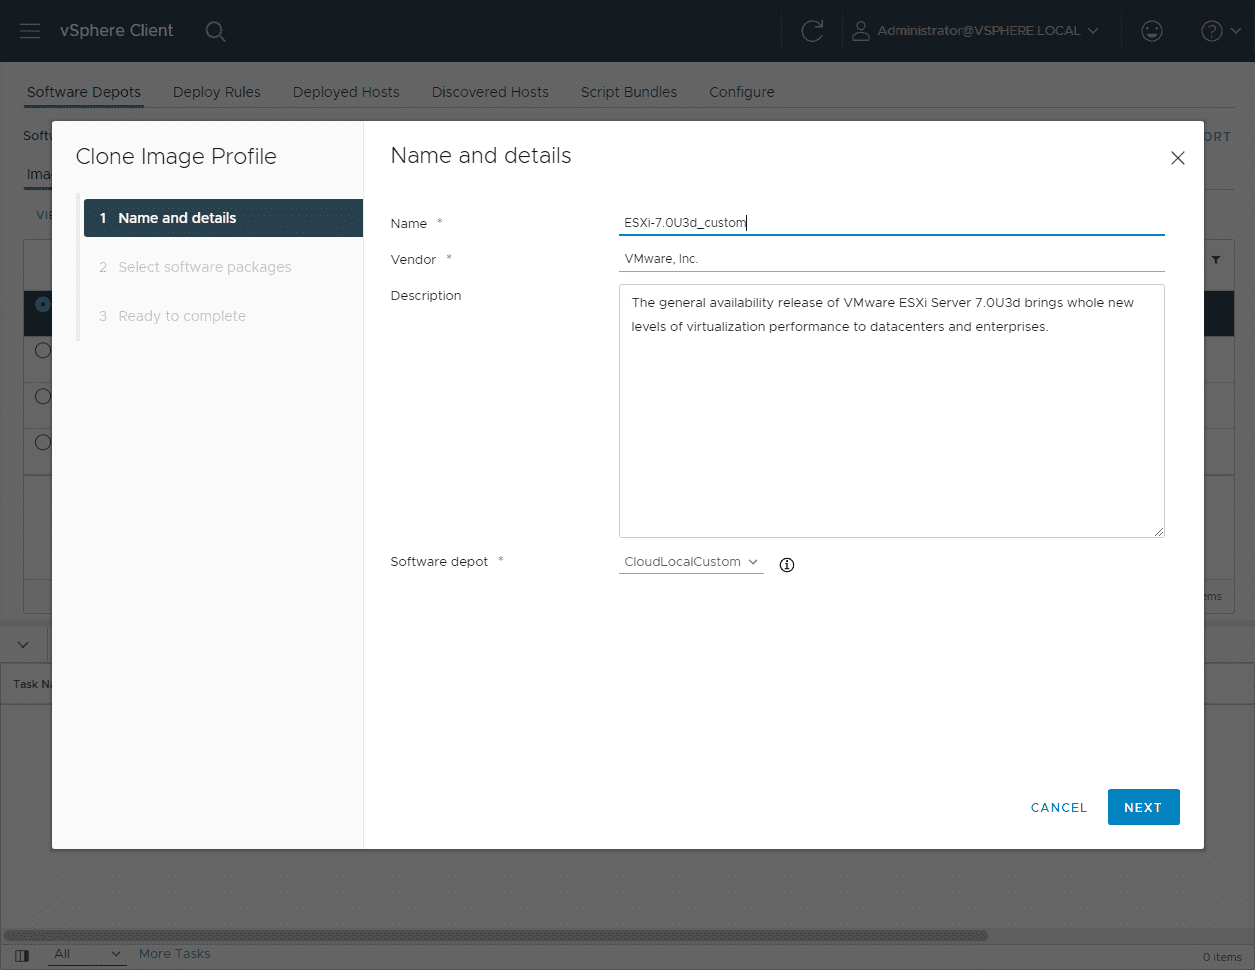
Name your cloned image and choose the Software depot to include it in. Here I am choosing my named custom Software depot that we created earlier.
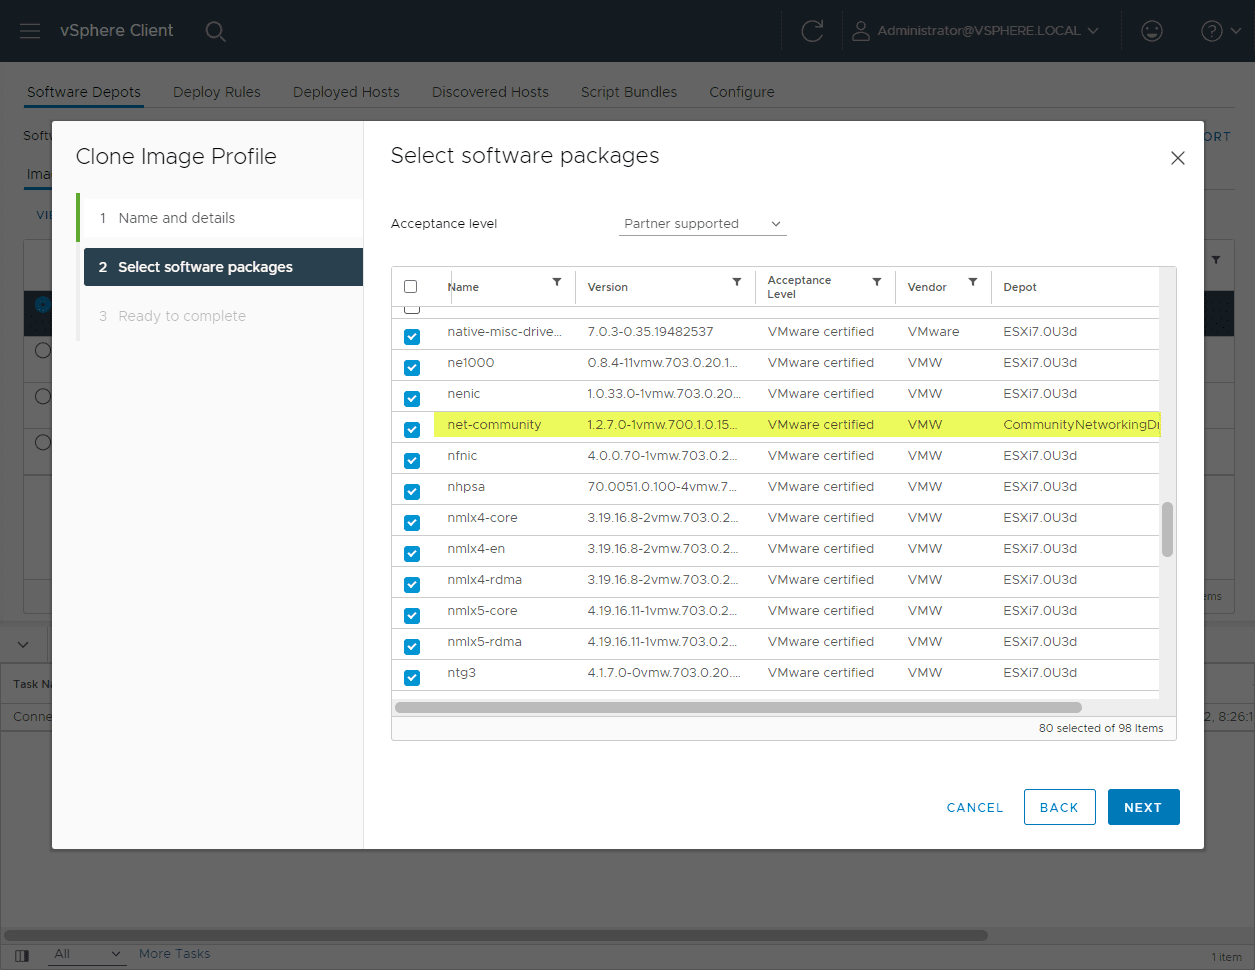
The next screen is where the magic happens. We can choose from the other software depot files we have uploaded, including the Community Networking Driver for ESXi.
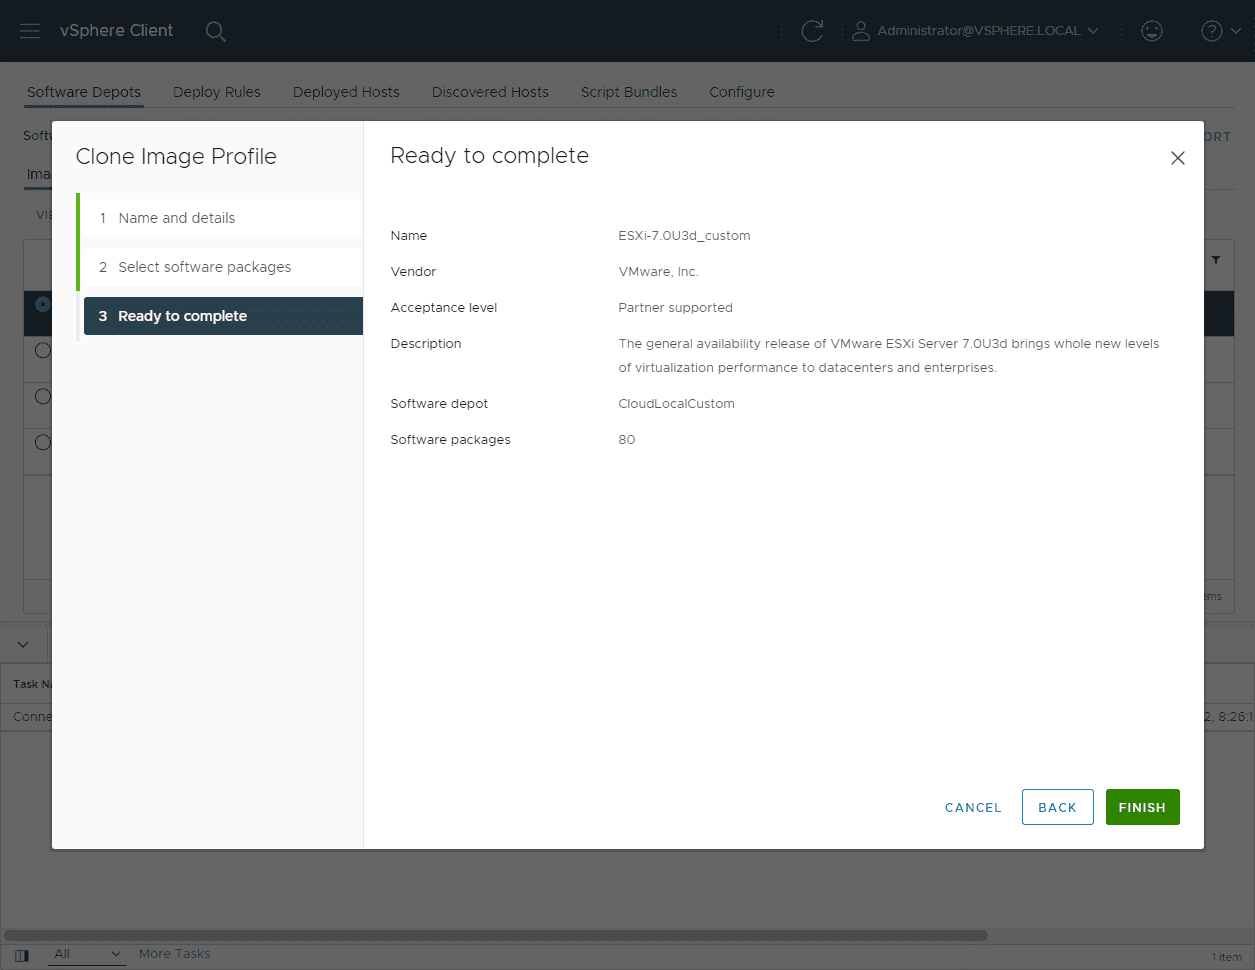
On the Ready to Complete screen, click Finish.
Now, you will be able to Export the resulting customized image containing the additional network drivers.
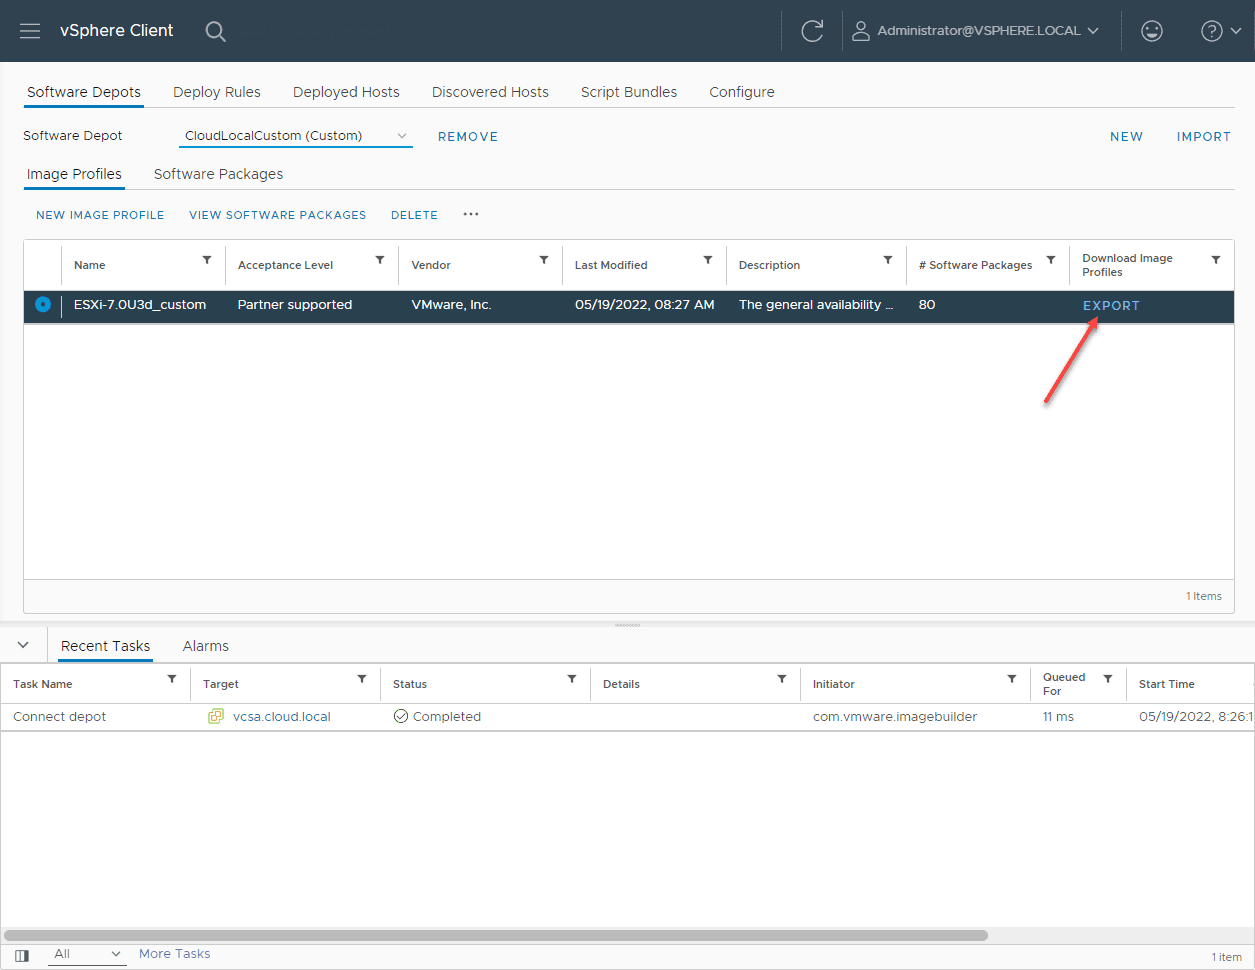
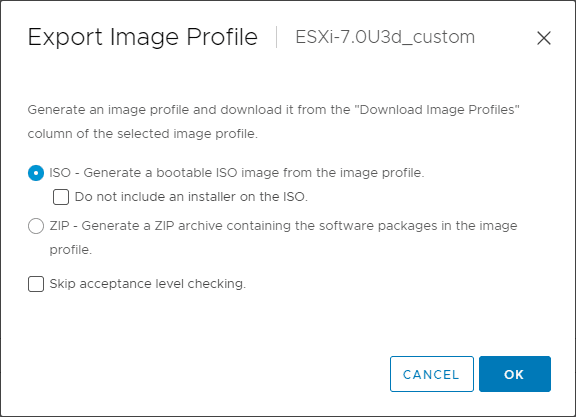
On the Export Image Profile dialog, you will see the possible export formats.
ESXi Auto Deploy Custom Image FAQs
- What is vSphere Auto Deploy? Auto Deploy is a robust solution for deploying custom ESXi images to hundreds of hosts and deploying host profiles. It provides a wizardized approach to creating custom ESXi images and allows easily exporting these to the desired format so you can create an ESXi custom ISO.
- How do you create a custom ESXi ISO image? Using Auto Deploy is easy. You import the desired software depots, clone your base image, select the files you want to include, such as customized drivers, and export the resulting file to an ISO.
- What is the Community Networking Driver for ESXi? This VMware Fling provides native ESXi drivers for commodity network adapters, which is great for home lab environments.
Wrapping up
To configure ESXi Auto Deploy add Driver to ESXi ISO Custom Image, you can easily do this using the ESXi Auto Deploy functionality in the vSphere Client. By importing the software depots, you want to use, you can then import custom drivers and other files needed for your custom ISO.


0 Comments