

Many these days are thinking about self-hosting their password manager, especially with the breach of LastPass and the potential for future cloud password manager breaches. There are many advantages to self-hosting services, including making yourself much less of a target.
Bitwarden is a widely acclaimed open-source password manager allowing you to securely store, manage, and access sensitive information. With the growing popularity of self-hosting, Bitwarden has introduced a new deployment option, the Bitwarden Unified Self-Host Deployment.
This new installation process simplifies deployment, allowing users to easily enjoy the premium features of Bitwarden on their own servers. We will explore the Bitwarden Unified Docker installation process, the benefits of self-hosting, and how it compares to other password manager solutions.
Why Self-Host Your Password Manager?
Self-hosting your password manager offers numerous benefits over cloud-based password managers, including:
Privacy and Security – With self-hosting, your sensitive information is stored on your own servers, providing an additional layer of security and privacy.
Customization – Self-hosting allows for greater customization, including using custom ports, configuring reverse proxies, and modifying SMTP settings.
Control – By self-hosting your password manager, you have total control over your data, ensuring that you can manage, access, and protect it according to your specific needs and preferences.
No Reliance on Third-Party Services – Self-hosting eliminates the need to rely on third-party services, ensuring that your password manager solution is always available, even if external services experience downtime.
Why Choose Bitwarden Unified Self-Host Deployment?
Password managers like Bitwarden help users manage their passwords, keeping them organized and secure. Unlike cloud-based password managers, the Bitwarden Unified Self-Host Deployment option gives users total control over their password database, ensuring their sensitive information is stored on their own servers.
You can view the official documentation for the solution here:
Greatly simplified approach
The Bitwarden Unified Docker installation simplifies the standard self-host deployment by consolidating multiple containers into one container, making it easier to manage and maintain. Bitwarden officially supports this unified deployment, and the beta release has received positive user feedback.
Still in beta, so expect issues
However, it is not without bugs in the first few releases, as there are problems that you might experience with Bitwarden Unified. In all fairness, though, Bitwarden Unified self-hosted is in beta and is not officially supported for production yet.
System requirements
Bitwarden unified deployment requires:
At least 200 MB RAM
Storage 1GB
Docker Engine 19+
Advantages of Bitwarden Unified Deployment
Total Control: With the Bitwarden Unified Self-Host Deployment, you have complete control over your password database, ensuring the security of your sensitive information.
Simplified Deployment: The unified deployment consolidates multiple Docker containers, making it easier to manage and maintain.
Premium Features: Self-hosting allows you to enjoy Bitwarden’s premium features on your own hardware.
Scalability: Bitwarden Unified Deployment supports Microsoft SQL Server database, SQLite, and MySQL databases, providing flexibility and scalability for your growing password management needs.
Customizability: The Bitwarden Unified Deployment allows you to customize various aspects of the installation, such as the custom port, reverse proxy settings, and SMTP settings.
Bitwarden Unified Docker Installation Process
The installation process for the Bitwarden Unified Self-Host Deployment involves the following steps.
Preparing the environment and creating the .env file
Preparing the Environment – Ensure your server meets the minimum hardware requirements for running Bitwarden. This includes having Docker and Docker Compose installed on your system.
Creating the Environment Variables – Create a .env file to store the environment variables required for the Bitwarden Unified Deployment. These include your installation ID, installation key, and external DB settings.
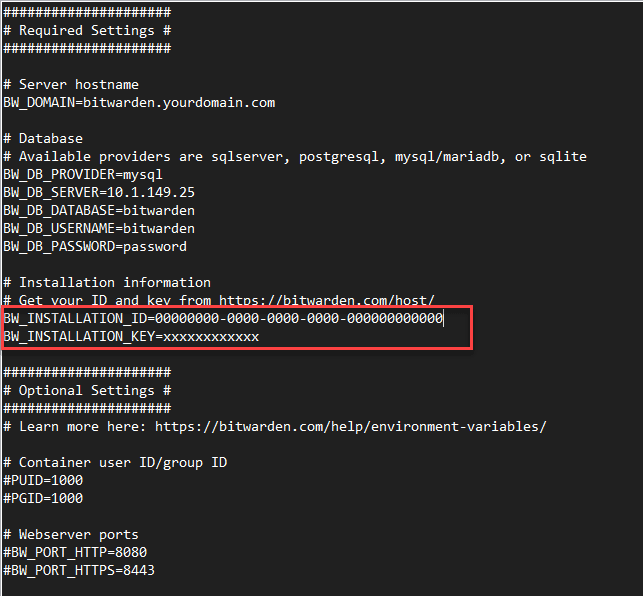
The Bitwarden Unified GitHub page contains the example below. Note the configuration you need to change includes the following. Uncomment the following lines if they are commented out. Also, replace the ID and Key with the information you obtain from Bitwarden.
BW_INSTALLATION_ID=00000000-0000-0000-0000-000000000000
BW_INSTALLATION_KEY=xxxxxxxxxxxx
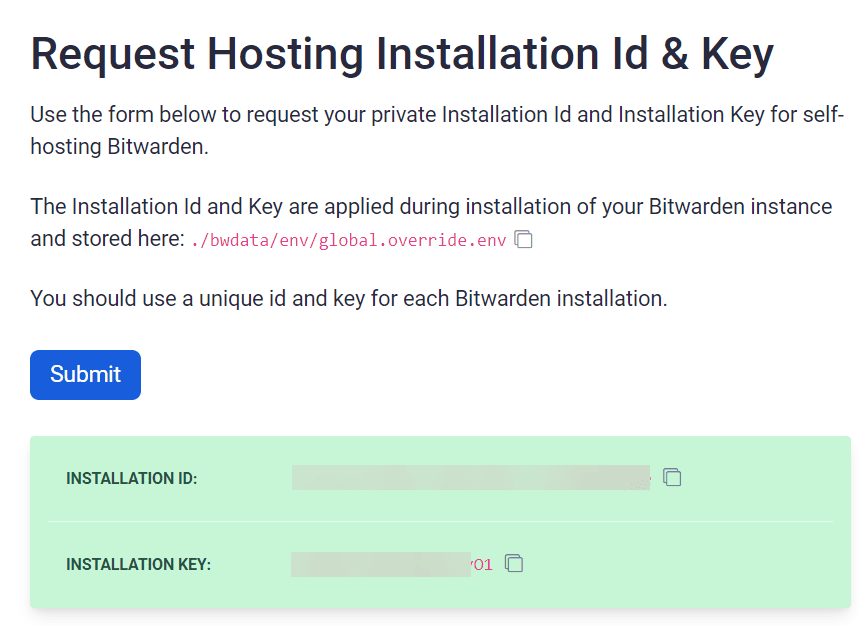
Request Hosting Installation Id & Key here: Requesting Hosting Installation ID & Key | Bitwarden
Take a look at a sample settings.env file here: server/settings.env at master · bitwarden/server (github.com)
BW_ENABLE_ADMIN=true
BW_ENABLE_API=true
adminSettings__admins=admin1@email.com,admin2@email.com
#####################
# Required Settings #
#####################

# Server hostname
BW_DOMAIN=bitwarden.yourdomain.com

# Database
# Available providers are sqlserver, postgresql, mysql/mariadb, or sqlite
BW_DB_PROVIDER=mysql
BW_DB_SERVER=db
BW_DB_DATABASE=bitwarden_vault
BW_DB_USERNAME=bitwarden
BW_DB_PASSWORD=super_strong_password

# Installation information
# Get your ID and key from https://bitwarden.com/host/
BW_INSTALLATION_ID=00000000-0000-0000-0000-000000000000
BW_INSTALLATION_KEY=xxxxxxxxxxxx

#####################
# Optional Settings #
#####################
# Learn more here: https://bitwarden.com/help/environment-variables/

# Container user ID/group ID
#PUID=1000
#PGID=1000

# Webserver ports
#BW_PORT_HTTP=8080
#BW_PORT_HTTPS=8443

# SSL
#BW_ENABLE_SSL=true
#BW_ENABLE_SSL_CA=true
#BW_SSL_CERT=ssl.crt
#BW_SSL_KEY=ssl.key
#BW_SSL_CA_CERT=ca.crt

# Services
# Some services, namely for enterprise use cases, are disabled by default. Defaults shown below.
#BW_ENABLE_ADMIN=true
#BW_ENABLE_API=true
#BW_ENABLE_EVENTS=false
#BW_ENABLE_ICONS=true
#BW_ENABLE_IDENTITY=true
#BW_ENABLE_NOTIFICATIONS=true
#BW_ENABLE_SCIM=false
#BW_ENABLE_SSO=false

#BW_ICONS_PROXY_TO_CLOUD=false

# Mail
#globalSettings__mail__replyToEmail=noreply@$BW_DOMAIN
#globalSettings__mail__smtp__host=smtphost.example.com
#globalSettings__mail__smtp__port=587
#globalSettings__mail__smtp__ssl=false
#globalSettings__mail__smtp__username=smtpusername
#globalSettings__mail__smtp__password=smtppassword

# Yubikey
#globalSettings__yubico__clientId=REPLACE
#globalSettings__yubico__key=REPLACE

# Other
#globalSettings__disableUserRegistration=false
#globalSettings__hibpApiKey=REPLACE
#adminSettings__admins=admin1@email.com,admin2@email.com
Configuring the Database – Choose the appropriate database for your needs. Bitwarden supports Microsoft SQL Server, SQLite, and MySQL databases. Configure your chosen database, ensuring it is accessible from the Docker container.
Bitwarden Unified with Docker compose or Docker run commands
Running the Bitwarden Unified Deployment – Use the following Docker Compose code to deploy Bitwarden. I am also introducing
version: '3.3'
services:
traefik2:
image: traefik:latest
restart: always
command:
- "--log.level=DEBUG"
- "--api.insecure=true"
- "--providers.docker=true"
- "--providers.docker.exposedbydefault=true"
- "--entrypoints.web.address=:80"
- "--entrypoints.websecure.address=:443"
- "--entrypoints.web.http.redirections.entryPoint.to=websecure"
- "--entrypoints.web.http.redirections.entryPoint.scheme=https"
ports:
- 80:80
- 443:443
networks:
traefik:
ipv4_address: 172.19.0.10
volumes:
- /var/run/docker.sock:/var/run/docker.sock
container_name: traefik
bitwarden:
depends_on:
- db
env_file:
- '~/homelabservices/bitwarden/settings.env'
image: bitwarden/self-host:beta
restart: always
networks:
traefik:
ipv4_address: 172.19.0.20
volumes:
- '~/homelabservices/bitwarden/data:/etc/bitwarden'
labels:
- "traefik.enable=true"
- "traefik.http.routers.bitwarden.rule=Host(`bitwarden.cloud.local`)"
- "traefik.http.routers.bitwarden.tls=true"
- "traefik.http.routers.bitwarden.entrypoints=websecure"
- "traefik.http.services.bitwarden.loadbalancer.server.port=8080"
container_name: bitwarden
db:
environment:
MARIADB_USER: "bitwarden"
MARIADB_PASSWORD: "password"
MARIADB_DATABASE: "bitwarden_vault"
MARIADB_RANDOM_ROOT_PASSWORD: "true"
image: mariadb:10
restart: always
networks:
traefik:
ipv4_address: 172.19.0.30
volumes:
- '~/homelabservices/mariadb/data:/var/lib/mysql'
container_name: mariadb
networks:
traefik:
driver: bridge
name: traefik
ipam:
driver: default
config:
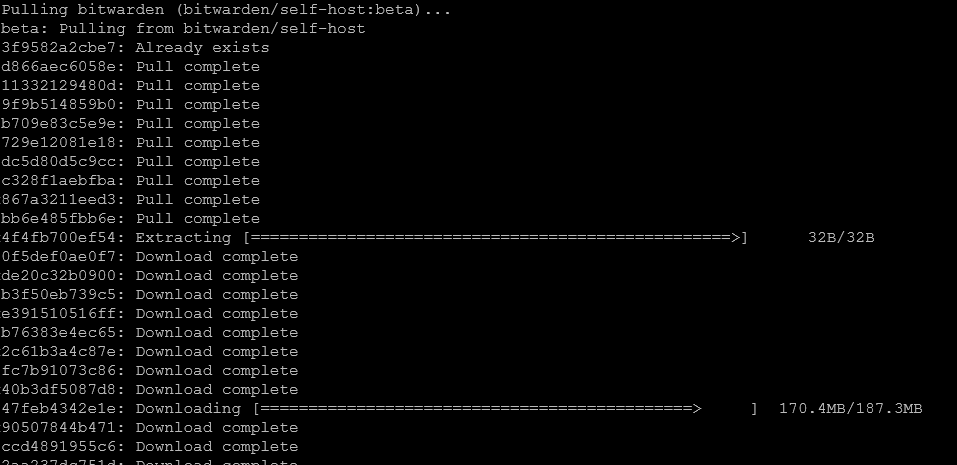
- subnet: 172.19.0.0/16Once you have your Docker Compose code, you can run docker compose up -d.

The containers start pulling down with the Docker Compose up -d command.
Running a docker compose ps command to view the running containers.

You can also run the Bitwarden Unified Deployment with a Docker run command:
docker run -d --name bitwarden -v /$(pwd)/bwdata/:/etc/bitwarden -p 80:8080 --env-file settings.env bitwarden/self-host:betaAccess the web interface and create a user
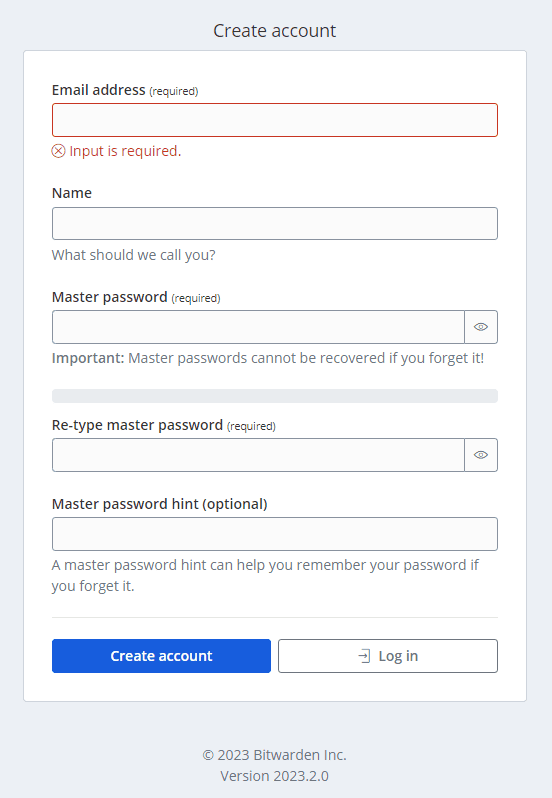
Once you bring up the Bitwarden server, you will be presented with the login screen. Don’t get confused here as you won’t be entering the email address you signed up for on the host page when you receive the ID and Key. You will need to click the Create account link.

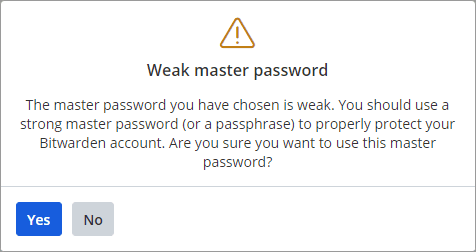
It will bring up the Create account form. Here you will fill in your email address, name, and create a master password. This will be an admin user.
If you create a weak password, you will get the warning below.
You should see the account created successfully with the green checkbox.
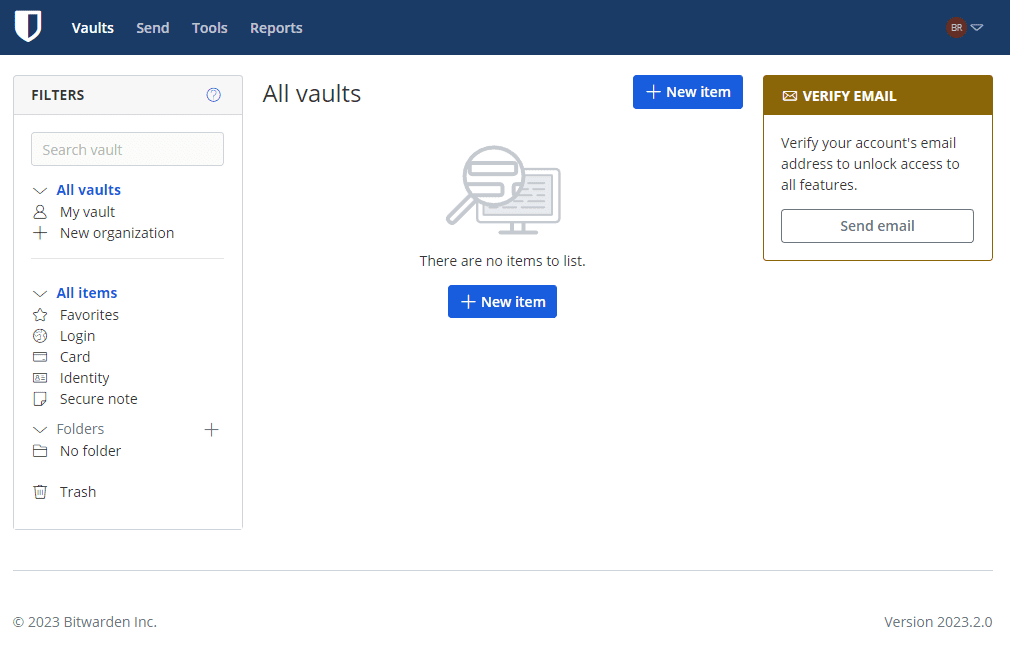
You will then be taken to the Bitwarden Unified self-hosted interface and your Bitwarden organization vault.
Comparison to Standard Deployment Option
The Bitwarden Unified Self-Host Deployment offers several advantages over the standard deployment option, which relies on multiple Docker containers. The unified deployment simplifies the installation process, making it more accessible to users without extensive technical knowledge.
Additionally, the unified deployment option offers better scalability, allowing for easy integration with Microsoft SQL Server, SQLite database, and MySQL databases.
No database included
However, one of the downsides of the Unified deployment is the lack of a DB included (double-edged sword). While the fewer containers helps to minimize the technical knowledge needed, you need technical knowledge to spin up a supported DB to run Bitwarden.
Self-hosted Standard Bitwarden deployment option still viable
However, the standard deployment option may still be preferable for users who require greater flexibility in their infrastructure or who are running Bitwarden on NAS servers or other hardware with specific requirements.
Choosing between the standard deployment option and the unified self-host deployment depends on your unique needs and technical expertise.
Wrapping up
Bitwarden Unified Self-Host Deployment offers a simplified, scalable, and customizable solution for users who want total control over their password manager. The Bitwarden Unified Docker installation process is straightforward and allows users to manage their sensitive information securely on their own servers.
Whether you choose the Bitwarden Unified Deployment or the standard deployment option, self-hosting your password manager offers numerous advantages over cloud-based alternatives. By taking control of your password management infrastructure, you can ensure your sensitive information’s security, privacy, and availability.
The Bitwarden Unified Docker installation is excellent for users seeking a powerful, flexible, and secure password manager solution. Following the steps outlined in this blog post, you can easily set up and manage your own self-hosted Bitwarden server, providing the peace of mind that comes with knowing your sensitive information is stored securely on your own servers.


0 Comments